Ready to DIY ceiling and wall drapery for your next party or an upcoming wedding? If you’re looking to add some style and drama to your event, then this post is for you. Fabric is a simple and affordable way to transform any event space, and with a little bit of creativity and some basic tools, you can easily create a stunning effect on your own. Learn the steps of creating your own ceiling and wall drapery, from selecting the fabric, knowing how much to order, and hanging the finished product. Whether you’re a seasoned DIYer or a beginner, we’ve got you covered with tips and tricks to help you achieve professional-looking results. So grab your tools and let’s get started!

How I Learned to DIY Ceiling and Wall Drapery
For my daughter’s wedding, we wanted to incentivize her to stay on budget and allow us to DIY most of her decor. To do so, we set her a very modest budget for the whole wedding and told her whatever she did not spend, we would double and give to her as cash. We felt it allowed her to use her creativity to stretch a dollar and give her the opportunity to start off her marriage with a bit of extra cash in savings. She did an amazing job and you’ll find many of the projects we did to save money here on the blog.
My daughter had one very specific request when it came to the decor of her reception space. She didn’t want it to look like a church gym. I can understand that completely, but the problem remained that it WAS a church gym! Our family had been to countless wedding receptions in that gym and I spent a long time trying to figure out how to make it unrecognizable.
To completely transform the space, I knew I was going to have to learn the secrets of a DIY ceiling and wall drapery. Outside of DIY-ing her wedding cake, this one task was what I was the most nervous about. Many a night, I found myself wide awake at 2:00 am trying to figure out how I was going to get it to work. This was her most important of all her wedding decoration ideas and I wanted to get it right for her!
Materials and Tools Needed to DIY Ceiling and Wall Drapery
- Lightweight fabric – organza, chiffon, gauze, tulle, or muslin
- Large heavy-duty eye bolts
- Heavy-duty braided fishing line – 100 lb strength
- Turnbuckles
- Drill
- Scissors
- Measuring tape
- Stud finder
- Small safety pins
How to Drape a Ceiling and Walls with Fabric
Time needed: 6 hours
How to Drape a Ceiling and Walls with Fabric
- Get clearance from your event space
They may already have the hardware installed in the walls and ceiling. If not, you will need their permission before installing eye bolts into their space.
- Determine where to add eye bolts around the space
Eye bolts will hold the weight of all the fabric and they have to be installed into studs in the wall. Wall anchors are not strong enough to hold both the weight, as well as withstand the pulling force of the wires.
- Select the fabric you will use as the drapery
Use lightweight fabric that will be sure to stay up during the event. You also need to decide if you want a sheer or opaque fabric.
- Plan the location of the support wires and the direction of the fabric
Create a scaled drawing of the space. Marking the location of eye bolts, where the wire will run, and the direction of the fabric. Take detailed measurements. This is not a place to guesstimate. Don’t forget to have the middle line higher than the side lines.
- Calculate how much fabric you need
The amount of fabric you need depends on whether you want a solid covering across the ceiling and walls and what type of fabric you have selected. If you have a sheer fabric, you will want to install it folded over on itself so it isn’t too see-through. Don’t forget to calculate the amount of swag or droop in your ceiling by adding 30% more fabric to that measurement.
- Install the eye bolts
Measure and mark the location of each eye bolt. Be sure they will be going into studs inside the wall. Predrill the hole in the drywall and stud, making the hole slightly smaller than the size of your bolt.
- Install the wire and turnbuckles
Tie the heavy-duty braided fishing line onto one turnbuckle. Attach it to one of the eye bolts and run the fishing line along one wall. Attach another turnbuckle to the other end and attach to the eye bolt. Adjust the turnbuckles to make the fishing line very tight. Repeat for the remaining lines.
- Hang the fabric
Run the fabric up and over the lines. If possible, do not cut the fabric until the rest of the fabric is in place. If you do need to cut it, leave a few extra feet to make adjustments at the end.
- Make any needed adjustments
Once all the fabric is up, adjust the spacing and amount of swag in the ceiling pieces so they are all equal. Use small safety pins to attach the fabric to the lines and to the fabric pieces around it to close the gaps.
- Add uplighting
While this step isn’t required, the uplighting takes the whole space to another level and highlights the beauty of the draped ceiling and walls.
DIY Ceiling and Wall Drapery Step-by-Step Instructions
Step One – Get Clearance from the Event Space
Whether you are using your church’s gym, or renting out a local party center, you have to get clearance from the owner to install DIY ceiling and wall drapery. Because there needs to be a few eye bolts drilled into the walls and ceiling, you can lose your deposit without first getting clearance. If you are lucky, they already have some installed.
Step Two – Determine Eye Bolt Locations
If eye bolts already exist in your space, measure their location and mark them on your plan. If you need to install eye bolts, find the studs you can drill them into. Again, measure and mark them on your plan. Don’t use wall anchors. They will not be strong enough to hold the weight of the fabric combined with the pulling from the fishing line.
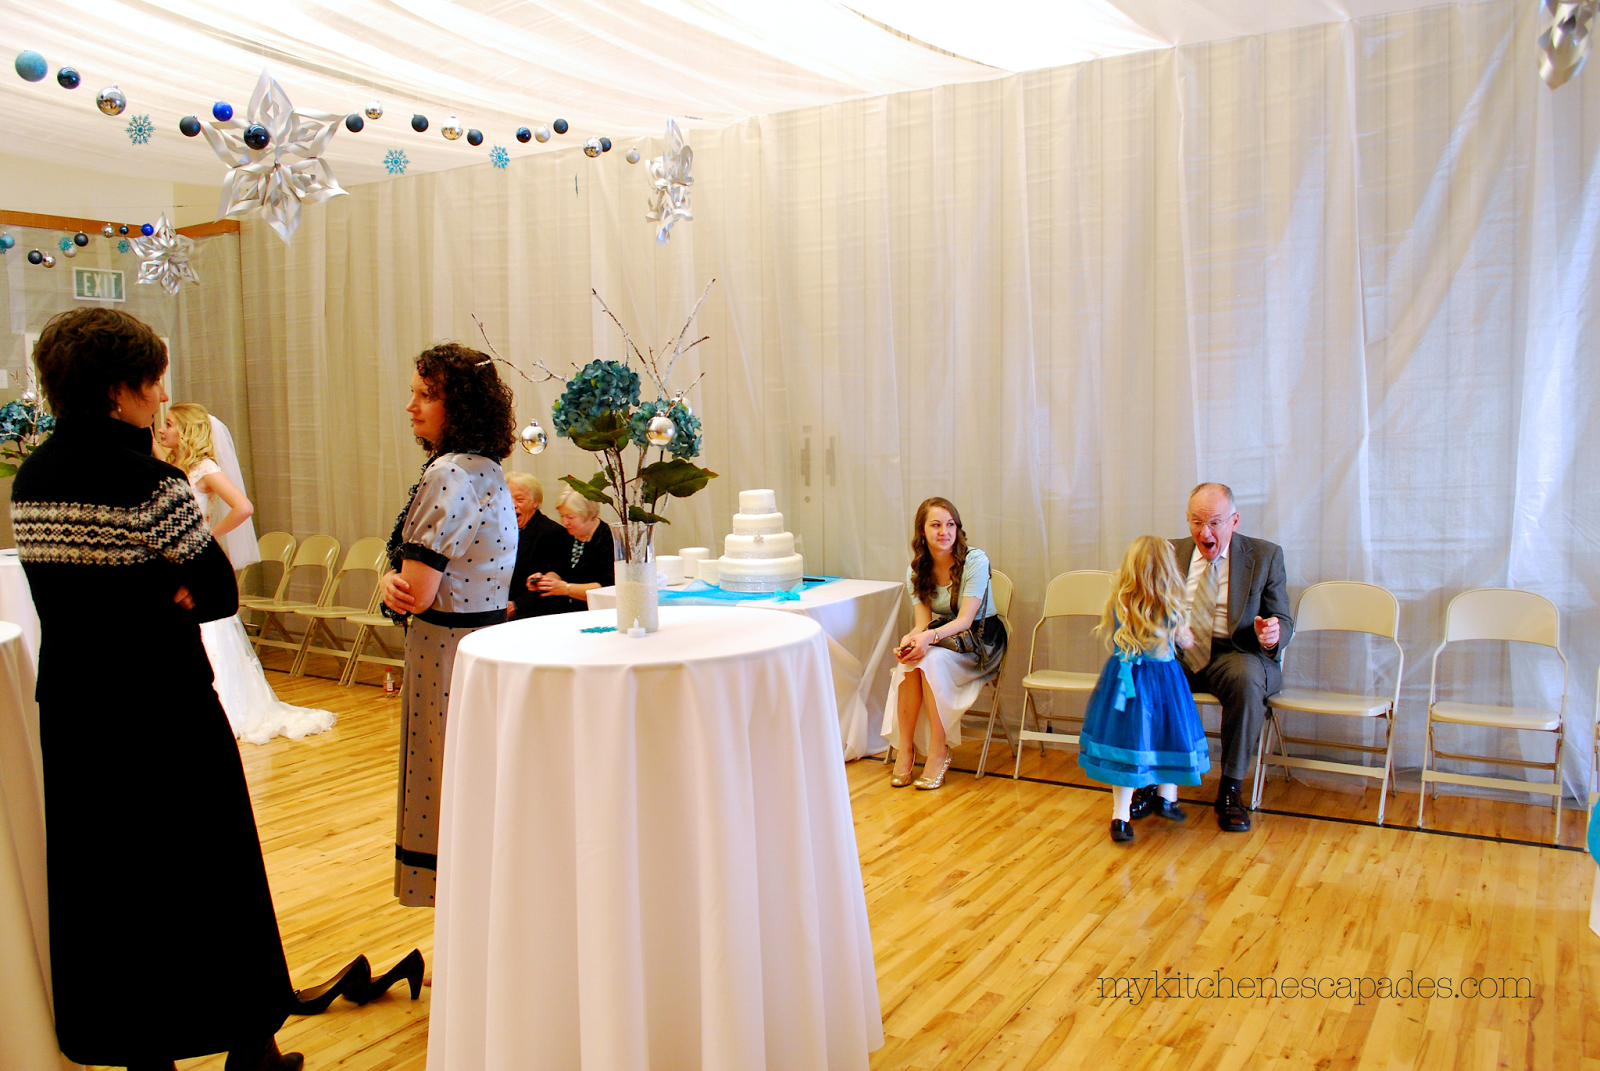
The one stipulation I had from our church before taking on DIY ceiling and wall drapery was that I needed to use the eye bolts that were already there. They did not want any more added, which is completely understandable. With this restriction, we had to ditch our plan to use a ceiling ring hoop and instead used a tent design for our ceiling and two walls. For the open ends of the tent, we attached the fabric to the walls using straight pins.

Step Three – Select the Fabric
You need to use lightweight fabric that will be easy to hang and not too heavy. You also need to decide if you want a sheer or opaque fabric. If you are in a smaller space, I highly suggest something sheer to keep the area from feeling too closed off. Organza, chiffon, gauze, tulle, or muslin are all great options.
The material I used for the ceiling draping was a shimmer white organza that I bought from Gifts International. It certainly wasn’t the highest quality organza I have ever seen, but that didn’t matter to me. I wasn’t making a dress. I just needed the effect! So, I bought 460 yards and only paid $250. For those who don’t know, that is a killer deal.
Step Four – Plan the Location of Support Wires and Direction of Fabric
Now that you know where your eye hooks will be and which fabric you will be using, it’s time to put pen to paper and plan out the specifics, along with measurements. Where will your support lines run? Which direction will the fabric run? Can you use single lengths of the fabric so you don’t have to sew anything? Double-check all your measurements in the space so you can confidently move on to the next steps.
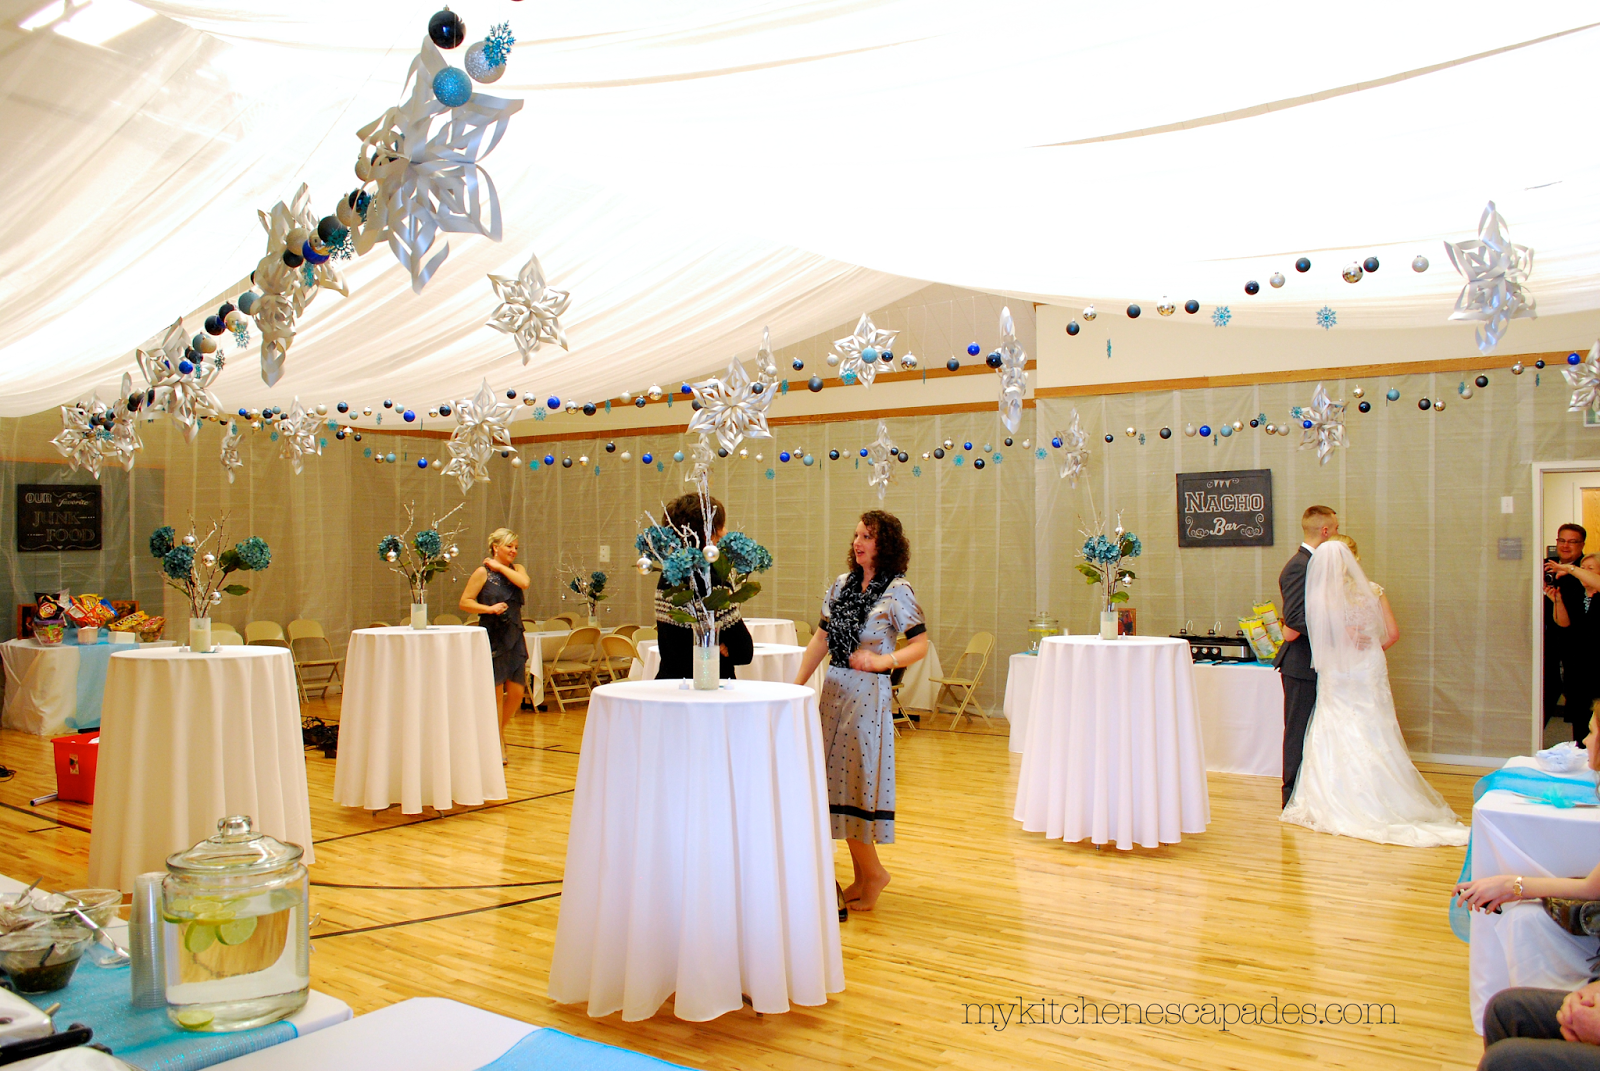
For a tent design, we only had to run three wires. One wire that was a high middle wire across the width of the center of the gym. The other two were lower wires along each end of the gym. Be sure your middle height is at least a couple of feet higher than your ends.
Step Five – Calculate How Much Fabric Needed
The amount of fabric you need will depend on the effect you are looking for on the walls and ceiling. Do you want a solid tent across the whole ceiling and walls or just strips of fabric scattered around the room? If you have a sheer fabric, you will want to install it folded over on itself so it isn’t too see-through. This is what we did. So our bolts of fabric were 60” wide, but we only got 30” of width since we installed it folded in half.
In your calculations, don’t forget to include the amount of swag or droop in your ceiling by adding 30% of extra fabric to your ceiling measurements. I would suggest adding an extra 10-20% to your final fabric amount to cover any “surprises” that will come along when the plan doesn’t go exactly as planned.
Step Six – Install the Eye Bolts
Measure and mark the location of the eye bolts, confirming with the stud finder that there is a stud where you need to install the bolt. Use a drill to predrill the hole for the eye bolt, using a drill bit that is smaller than the size of the bolt so the threads will have something to grab onto once installed.
Step Seven – Install the Wire and Turnbuckles
Purchase turnbuckles that have a hook on one side and a loop on the other. This allows you to tie the fishing line onto the loop end and then the hook goes onto the eye bolts. Install a turnbuckle on each end of the line and attach them to the eye hooks. Adjust the turnbuckles to make the line very tight.

Step Eight – Hang the Fabric
Run the fabric up and over the installed fishing lines. If possible, do not cut the fabric until the rest of the fabric is in place. This gives you the freedom to adjust as needed. If you do need to cut it, leave a few extra feet to make adjustments at the end.
For our space, we started on one end on the floor, fed it up and over the wire, across the middle wire, and then down to the other end wire, then down to the floor. We got lucky because we used bolts of material that had 23 yards on each and that was the perfect amount to go the whole length. It also gave us a bit of material for a draping effect from point to point on the ceiling. No sewing is required for this DIY ceiling and wall drapery!
Step Nine – Make Adjustments to the Draping
It will be difficult but don’t make adjustments until all the fabric is hung on the ceiling and walls. You’ll only end up having to go back and adjust it all again later. Use small safety pins to attach the material to the wires so they don’t slip. And then to pin together any strips of material that were gapping
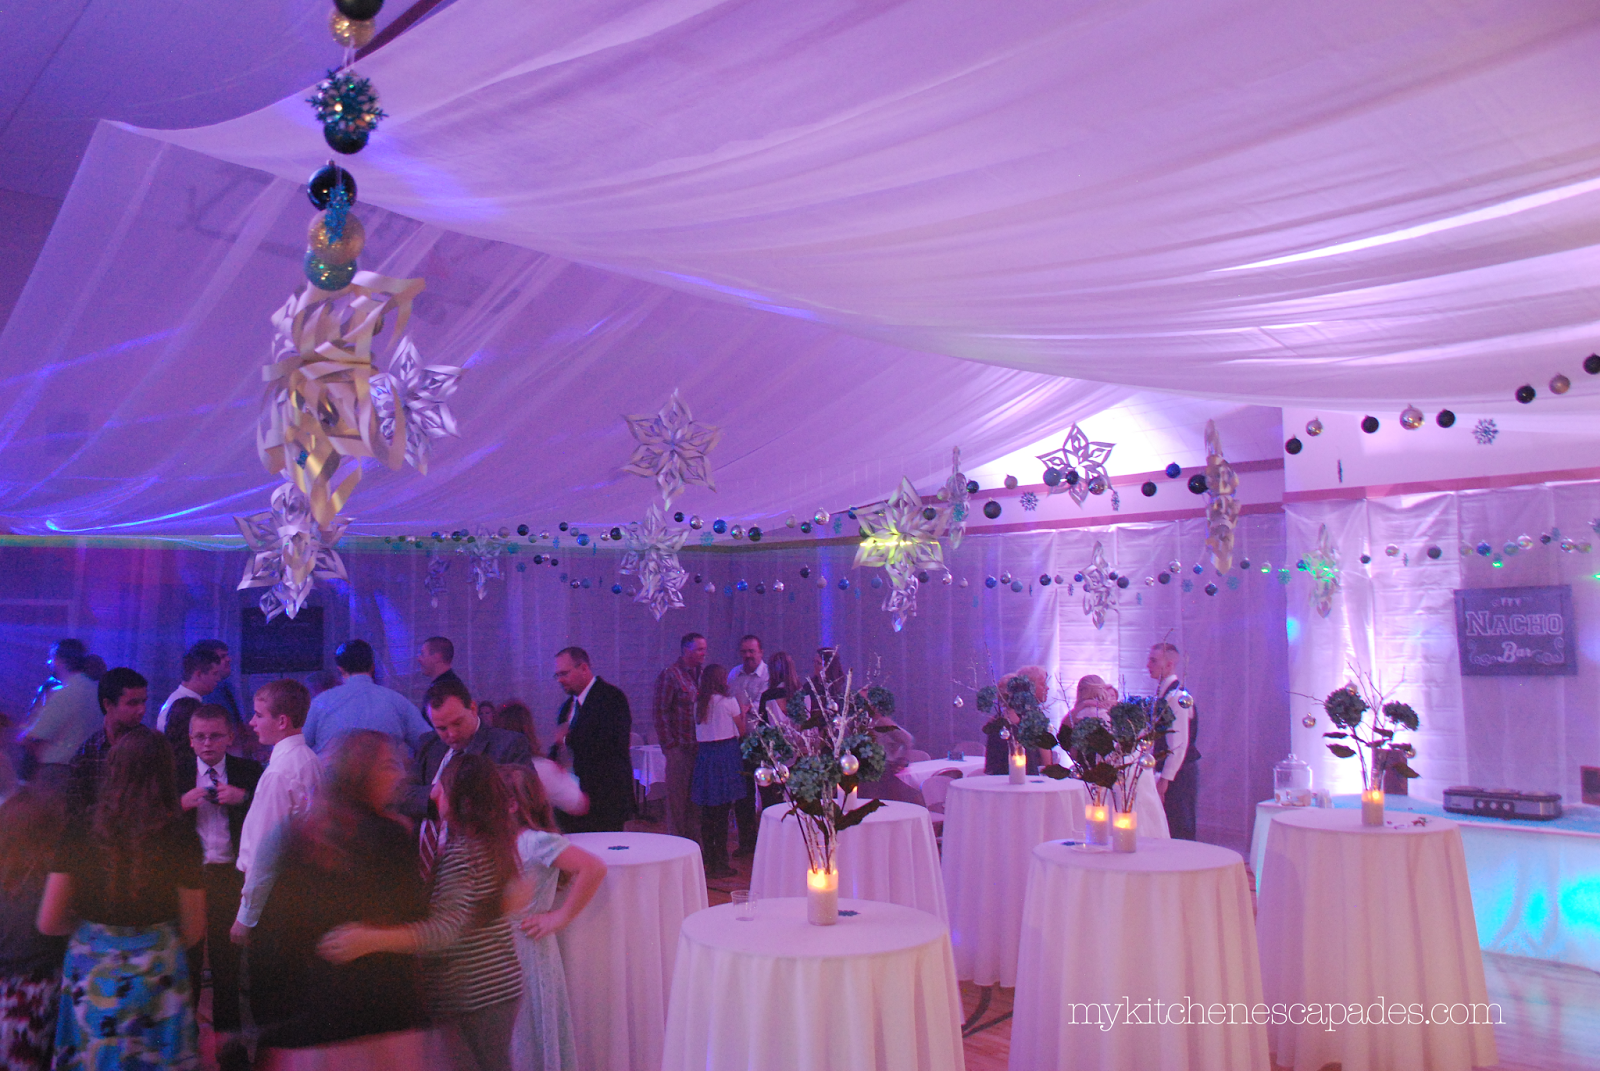
Our theme for the day when we were hanging this massive amount of organza on the ceiling and walls was “It doesn’t have to be perfect. It is going to be dark.” It is easy to obsess over every little seam and bump, but the reality is, once the party started and the overhead lights were turned off, and the uplighting was turned on, it was nothing but a glittery, magical space. Even I didn’t notice the not-so-perfect sections.
Step Ten – Add Uplighting
This last step certainly isn’t required but makes such a massive difference to a DIY ceiling and wall drapery job. It adds softness and drama to all your hard work. And believe it or not, helps hides the imperfections.
During the day and with the overhead lights on, we were a bit frustrated with how see-through the organza was. But again, once the lights were off and the lighting scheme going, it was perfect. The shimmer in the organza did a great job of reflecting the up-lights around the room and the lights from the DJ. It was a pure winter wonderland!

DIY Ceiling and Wall Drapery FAQs
To keep the drapery from becoming too heavy for the support wires and bolts, be sure to use lightweight fabrics. Organza, chiffon, gauze, tulle, or muslin all work very well to drape ceilings or walls.
The amount needed depends on how you want the finished ceiling to look, and the type of fabric you are using. If you choose a sheer fabric like organza, you will want to drape the ceiling with two layers of the organza so it isn’t too see-through. When calculating the amount of fabric needed to span the ceiling with a bit of droop (or swag) between the connection points, add an additional 30% of fabric to the ceiling measurement.
How long does it take to DIY ceiling and wall drapery?
So how long did all this draping and wall covering take? There were 6-8 of us working on it and it took us about 7 hours. Now, having done this once before, I think I could easily do it again in 4-5 hours. Luckily for me, my next oldest child is only 17. I have some time before having to whip up this skill once again!
If I would have had a detailed tutorial on how to DIY ceiling and wall drapery like this one, I know it would have taken us significantly less time. But like all big projects, you go in with a detailed plan. Then, spend most of your time troubleshooting all the unexpected problems that pop up along the way.
Looking for More Great DIY Wedding Ideas?
I have a whole series on throwing a wedding on a budget that is simply gorgeous! You can see all 16 different articles by clicking here.


Looking for more than wedding decor? Subscribe to My Kitchen Escapades to get new recipes delivered straight to your inbox! You can also stay in touch on TikTok, Instagram, Facebook, Pinterest, and YouTube for all the latest updates!


82 comments
This is awesome. I am trying to use material in my church for my wedding to drape from one end of the church to the next. I measured and it is 24 feet. Do you know what would be sturdy enough to hold the material up so I can use and create a middle entrance for myself (bride) in the church.
We used wire attached to eye bolts to hold up the material. We also tried a heavy duty fishing line, but it stretched too much and eventually broke. Good luck! – Carole
Hi. Cam u tell me the wire and eye bolt. Or a pic
Thank you so much for the tutorial. It looks awesome,
You are welcome Rae! I hope it was helpful -Carole
How big of a space did the tent make? Thanks
Danielle- I don’t have the exact measurements anymore but about 50 feet wide is my best guess.
Hello I purchased this organza material as you instructed. The left and the right side are folded I notice as I unroll the bolt. Did you leave those ends folded when hanging the material or you laid the material totally flat? Did you double up or single layer?
We left it folded because the organza was thin. Good luck!
please tell me exactly the type of wire and turnbuckle you used. I’m not sure where you used the turnbuckle. I never even heard of a turnbuckle!!! i love what you did, but i need some more specifics in order to do it myself for my party. Can i send you a photo of the room so that you can get an idea?
Janie- a turnbuckle was attached to one end of the wire and then the other end of the turnbuckle hooked onto the eye bolts already in the walls. The turnbuckle then turns so you can tighten the wire to make it tight enough so it doesn’t droop. If you don’t use a turnbuckle, you will never get your wire tight enough across the span of the room.
As far as the type of wire and turnbuckle, it all depends on how big of a span you have. Talk to your local hardware store and they can help you pick an appropriate size for both.
Looks great!
What type of material did you use?
Haley – I used a very inexpensive organza fabric. In the post, I have a link to the online store I bought the material from. -Carole
Hi,
This looks stunning. I’m in desperate need of transforming a hall into something great for my daughters 21st birthday. It’s coming up real soon and I’m keen to know where you purchased your rolls of organza from.
Thanks!
Roberta
Roberta- there is a link in my post directly to the website I used!
I can’t find the link that your order your organza.
Can you post it again?
Thanks a lot.
It is in the post….Gifts International was the company I used.
Hello Carole. I LOVE this! And it’ll really help me to decorate the tent for our wedding on our tight budget! If we get a tent that is 20’x40′ how much material do you recomend me purchasing? Thank you so much.
Lisa- that really all depends on how much material you want hanging down and how much you want to bunch it together. My measurements are listed and I ordered three extra bolts, which we used! If I would have had more, we would have used it. Order more than your calculations say you should
Hello I also have a 20×40 tent rented for my wedding in June and want to do this so bad to decorate it! !! How much fabric did it take u???
Hi Daydra! Good luck with your wedding. The article has the amount of fabric I bought
This is wonderful! Well done, you did an amazing job! Thank you for the clear instructions. Your daughter had a beautiful wedding reception 🙂
Thanks Frankie! I really appreciate your kind comment -Carole
How did you get away with drilling eye hooks in someones walls?
I have never been able to do that when I have hung drape and I hang lots of drape for weddings.
I have always been asked to stay away from the walls and not to use hammers or drills in someone else’s venue.
Hi Geri! The church already had some eye hooks into the ceiling and walls, then we got permission to add two more for our needs. And it wasn’t into the walls. It was a strip of wood trim that ran all around the walls, which made it quite sturdy and they didn’t worry about us damaging dry wall.
There’s currently a sale on their organza on the website you linked.. Is that about the price you paid for yours? I saw that you said you spent a little over $200 for the kind you got but the pricing on there is different now so I want to make sure I get the right kind.
I bought mine two years ago so I’m not sure. Any organza will work! Good luck
I could have written your remarks “awake every night at 2am”! Our daughter also agreed to use our church hall but wants the ceiling hidden. We settled on a centered circle with 12 rays of fabric going out. I ordered 250 yards of 108″ tulle. I found a formula for multiplying each length by 1.3 to get the right drape. I’m starting tomorrow on unrolling those bolts, cutting and sewing a casing on the end and feeding them onto a stuff wire circle of about 18″. Will suspend that with wire from the center hook that is already in place. For the ends of each ray I purchased Clik system magnets that will stick to the metal frames of the suspended ceiling tiles. Keeping fingers crossed but it all looks good on paper and in my head! :). We are borrowing cafe lights too to hang from these super strong magnets. Thanks for your ideas!!
Good luck Connie! It was so much work but the end result was worth it all.
I was wondering about the magnets. Are you using the Cultrual Hall?
I’m not sure what magnets you are referring to Nerell.