This photo transfer to wood tutorial is here with the best step-by-step photo instructions you can find online. I love different photo crafts to display pictures at a wedding, party, or celebration. These are so simple and inexpensive to make! You will find a million ways you can use this technique in your own home decorating. Or you can make birthday and Christmas gifts for just a few cents each. I made these for about $1.25 a piece and you won’t believe what part of this project caused me to bleed….

Why I Love This Project
For my daughter’s wedding, we wanted to incentivize her to stay on budget and allow us to DIY most of her decor. To do so, we set her a very modest budget for the whole wedding and told her whatever she did not spend, we would double and give to her as cash. We felt it allowed her to use her creativity to stretch a dollar. And, it gave her the opportunity to start off her marriage with a bit of extra cash in savings. She did an amazing job! You’ll find many of the projects we did to save money here on the blog.
One of my favorite parts of a wedding reception is looking at the fun photos of the couple. I am honestly disappointed when there aren’t any on display! I made 8 of these photo transfers to wood pieces to scatter around the reception area so while people mix and mingle, they will get to see all my favorite pictures from their engagement photo shoot. And don’t worry…..I was the photographer for their shoot so I didn’t break any copyright laws 🙂
I love this photo transfer to wood because my daughter will use them in their own home as decor. I love something that serves double duty! I’ve also used this technique to make inexpensive Christmas and birthday gifts for family and friends.
I have a whole series on throwing a wedding on a budget that is simply gorgeous! You can see all 16 different articles by clicking here.
What is a Photo Transfer to Wood?
A photo transfer to wood is a simple process of transferring the ink from a printed photograph or text onto a piece of wood using a matte gel medium. The gel medium allows the ink to transfer onto the wood. Then you remove the paper by getting it wet and rubbing it off. It’s as close as you can get to printing onto wood without an expensive piece of equipment. Once the paper has been removed, the surface is sealed with matte Mod Podge to be sure the ink stays on the wood.

Supplies Needed to Transfer a Picture to Wood
Many of these supplies you might already have at home, or can purchase quite inexpensively at your local store or from Amazon using the links in this article.
- Wood plank – either a manufactured one all ready for art projects, or cut your own from a piece of wood from your local home store.
- Sandpaper – you’ll want both a rough grit (60 grit) and something finer (100 or 200 grit) depending on the surface of your wood.
- Thin printer paper – since you will be wetting and rubbing off the paper after the photo transfers, you do not want to use your quality, thick printer paper for this. Definitely, something less than 20 lb paper is best.
- Laser printer – if you do not own a laser printer, you can ask a friend to print your photo or take it to a local print shop and pay about $0.20 per sheet to print. Unfortunately, an inkjet printer will not give you the same results.
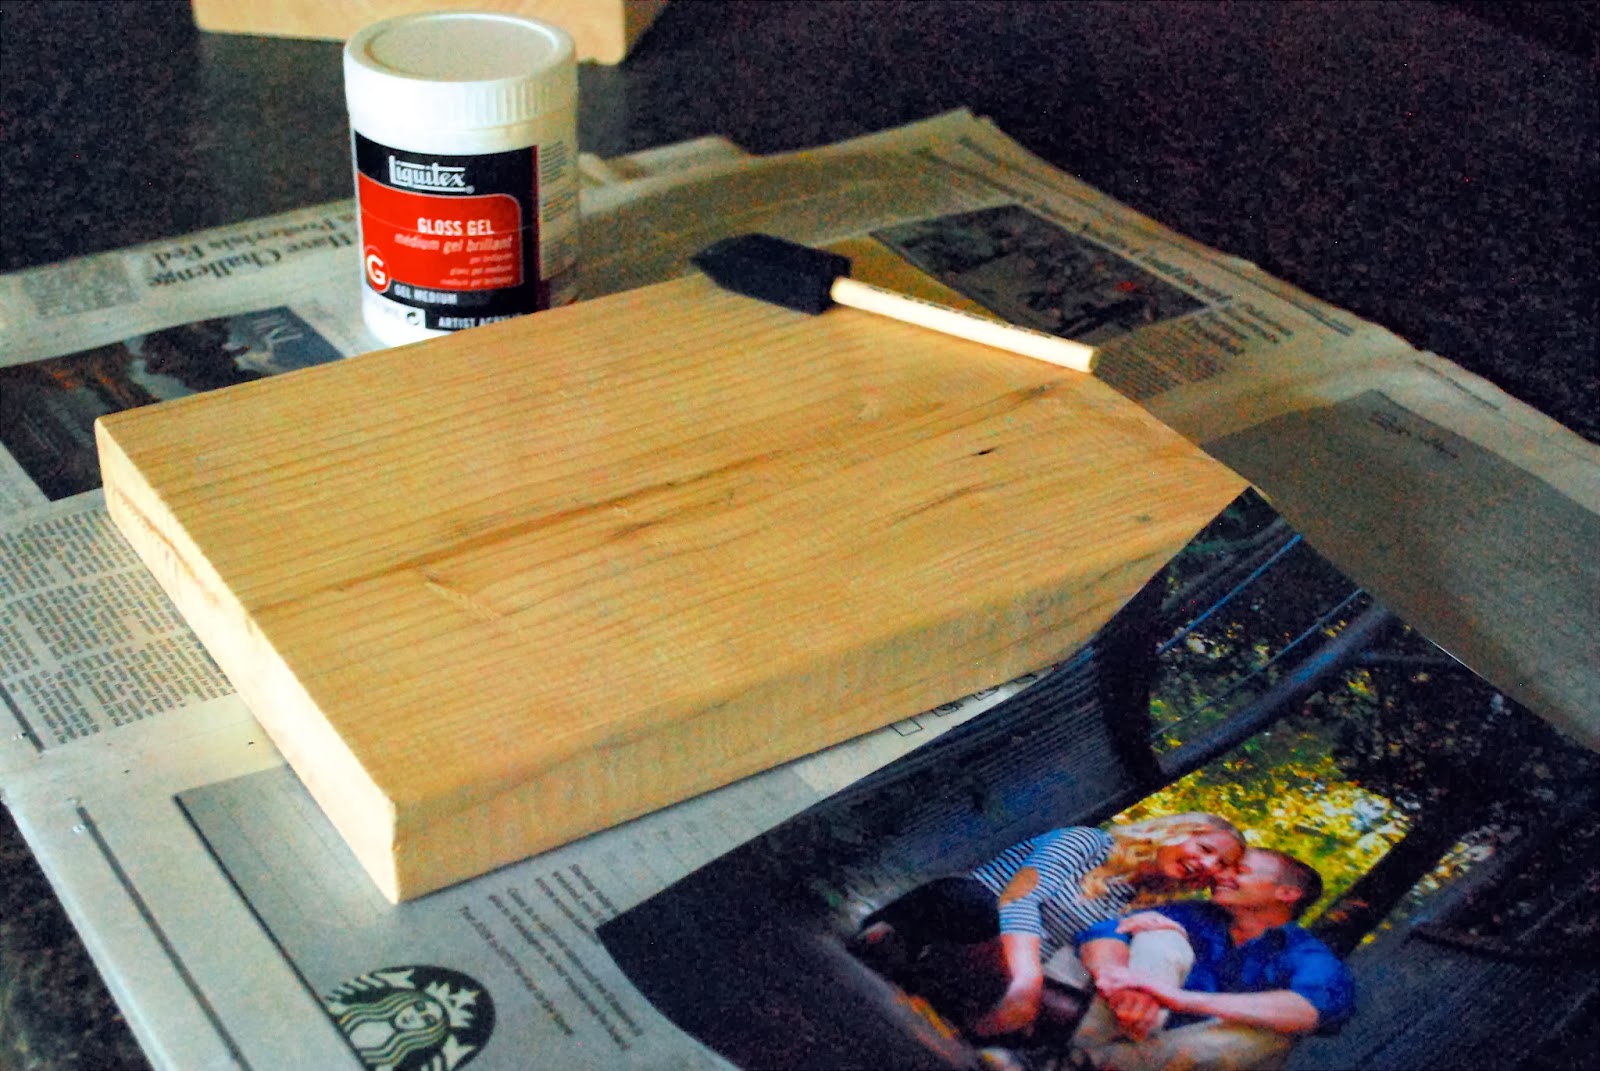
- Matte gel medium – this is the magic sauce in the success of this project. Using it will result in the cleanest and sharpest transfer of the ink from the paper onto the wood surface.
- Mod Podge – you can decide on the finish you would like. I used a matte finish but you can also get this product in a gloss, semi-gloss, or satin finish. Think about where you will be displaying the project and if there will be glare from overhead lights or the sun. If so, go for the matte or satin finish so there won’t be a glare.
- Wide foam brushes – using two works best so you can use one for the gel medium and one for the Mod Podge.
- Wood stain (optional) – I added stain to the exposed wood because I wanted a darker finish but this certainly isn’t required if you like the natural look.

How to Photo Transfer to Wood
As long as you have to proper supplies, listed above, it is quite easy to transfer a picture to wood by following the steps below. More detailed directions can be found by clicking on each step, or by scrolling down further in the article.
Time needed: 1 day
How to Photo Transfer to Wood
- Prepare the wood
You want wood that is free from major blemishes and that has been sanded smooth with fine-grit sandpaper.
- Prepare the photo
Print the picture onto thin paper using a laser printer and cut it out so there is little to no excess white paper.
- Apply the gel medium to the wood
The gel medium will allow the ink from the photo to transfer onto the wood cleanly.
- Place photo face down onto gel medium
Rub the photo down firmly so all the ink makes contact with the medium and let it dry for 12 hours.
- Remove the paper
Wet the surface of the paper with water and carefully rub away with paper until only the ink remains.
- Sand edges of photo (optional)
Use some sandpaper to soften the edges of the photo so it blends into the background a bit more naturally.
- Stain the unfinished wood (optional)
Use a wood stain to apply stain to the remaining exposed wood. If there is any exposed gel medium on the wood, it needs to be sanded away or the stain won’t be able to penetrate the wood beneath it. Dry for 10 hours.
- Seal the photo transfer
The photo transfer to wood needs to be protected and this is best done using a matte or satin Mod Podge. It will not damage the ink and will dry completely clear, even though it goes on white.
Photo Transfer to Wood Step-by-Step Instructions
Step One – Prepare the Wood
When choosing your wood, the rougher the wood, the rougher the image transfer will be. Knots and dark spots will show through the transfer so keep that in mind as well when placing your photos. I bought the smoothest piece of wood I could find because I wanted as clean of a photo transfer to wood as possible. I sanded the rough spots before beginning with 60-grit sandpaper. Then I used fine-grit sandpaper (100 or 200 grit) to perfectly smooth the wood. This is key for a successful ink transfer!
I used a 2 x 10 x 8 pine board that I bought for $8, then cut them into eight 12-inch lengths. I wanted something thick that could stand on its own when displayed. However, you could easily use any scrap piece of wood or something thinner. You can also grab one of the pre-cut and pre-sanded wood plaques that are made for a variety of art projects.
I debated making large, thin panels from large sheets of plywood to hang on the walls of the reception. However, that would require me to have the pictures poster-printed and would have cost a good chunk of change. In the end, I decided to use pieces of wood sized to go with a normal sheet of copy paper I could print at home. If you want something bigger, go for it and have it printed at your local print shop instead.
Step Two – Prepare the Photo
To begin, print your desired picture or text design on regular paper (not photo paper) from your laser printer. Use thin printer paper since you will have to rub it away. Nothing thicker than 20-pound paper.
You can print your photo in color, black and white, sepia, or any other version you would like. You must print it from a laser printer or it won’t work well. Also, keep in mind that your image will be a mirror image of your original picture. If you have any words in your design, they will come out backward unless you mirror that image before printing it.
Cut out the picture or design. This just removes any excess paper before you photo transfer to wood. Again, you will be rubbing away the paper so cut away any paper that isn’t part of your design to save you extra work.
Step Three – Apply the Gel Medium
Use a damp cloth to wipe the surface of the wood completely so it is clean and slightly wet. The slight wetness helps the ink transfer onto the wood with better quality. Use a wide foam brush to apply the matte gel medium. Apply it evenly and thick enough that you can see it on the surface of the wood.
Be sure you apply on the wood only where you will be placing the photo. It will cause problems if it is on the wood where you are trying to stain the wood in step seven.
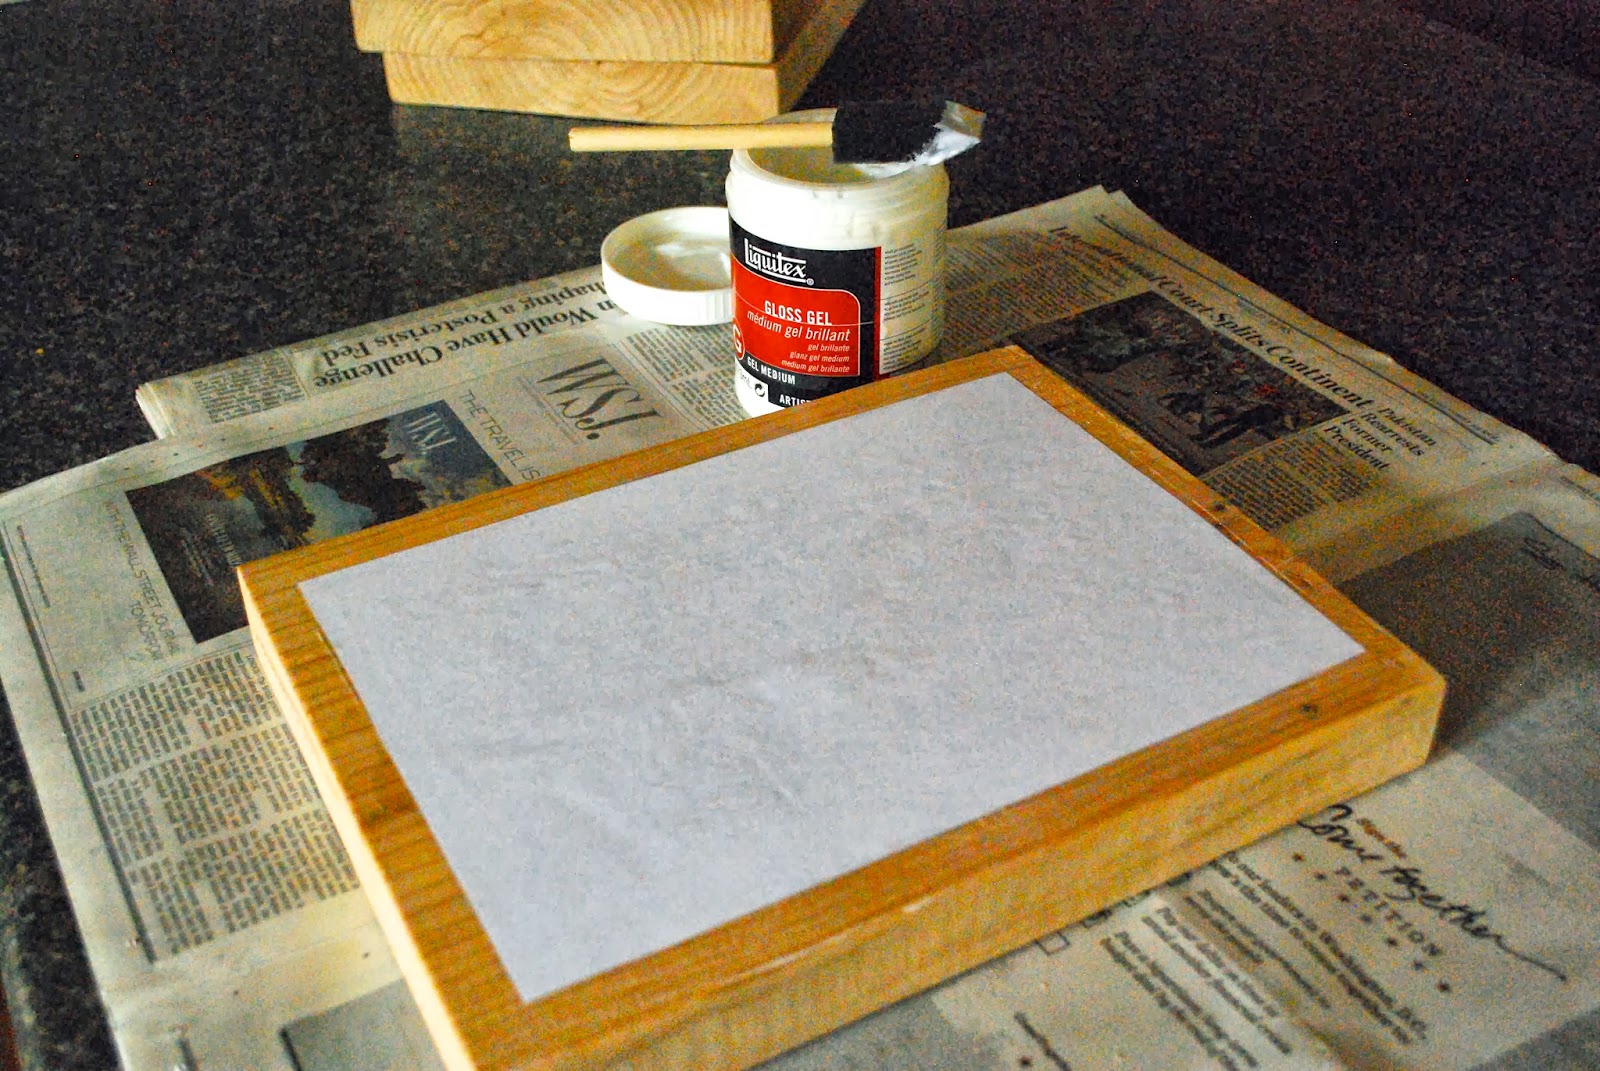
Step Four – Place the Photo
Carefully line up your picture or design, face side down, before pressing it into the gel medium. Once you put it down, it will be hard to adjust it so be cautious. I like to curve the paper so the middle is closest to the wood, then work my way to the edges. Press down firmly and smooth out the picture. Be sure to rub the whole surface of the paper so the gel medium will meet with every point of your picture. Wipe away any gel medium that oozes out from under the photo with a clean, damp cloth.
Do not remove the paper. Allow it all to dry for at least 12 hours before continuing on to step five.
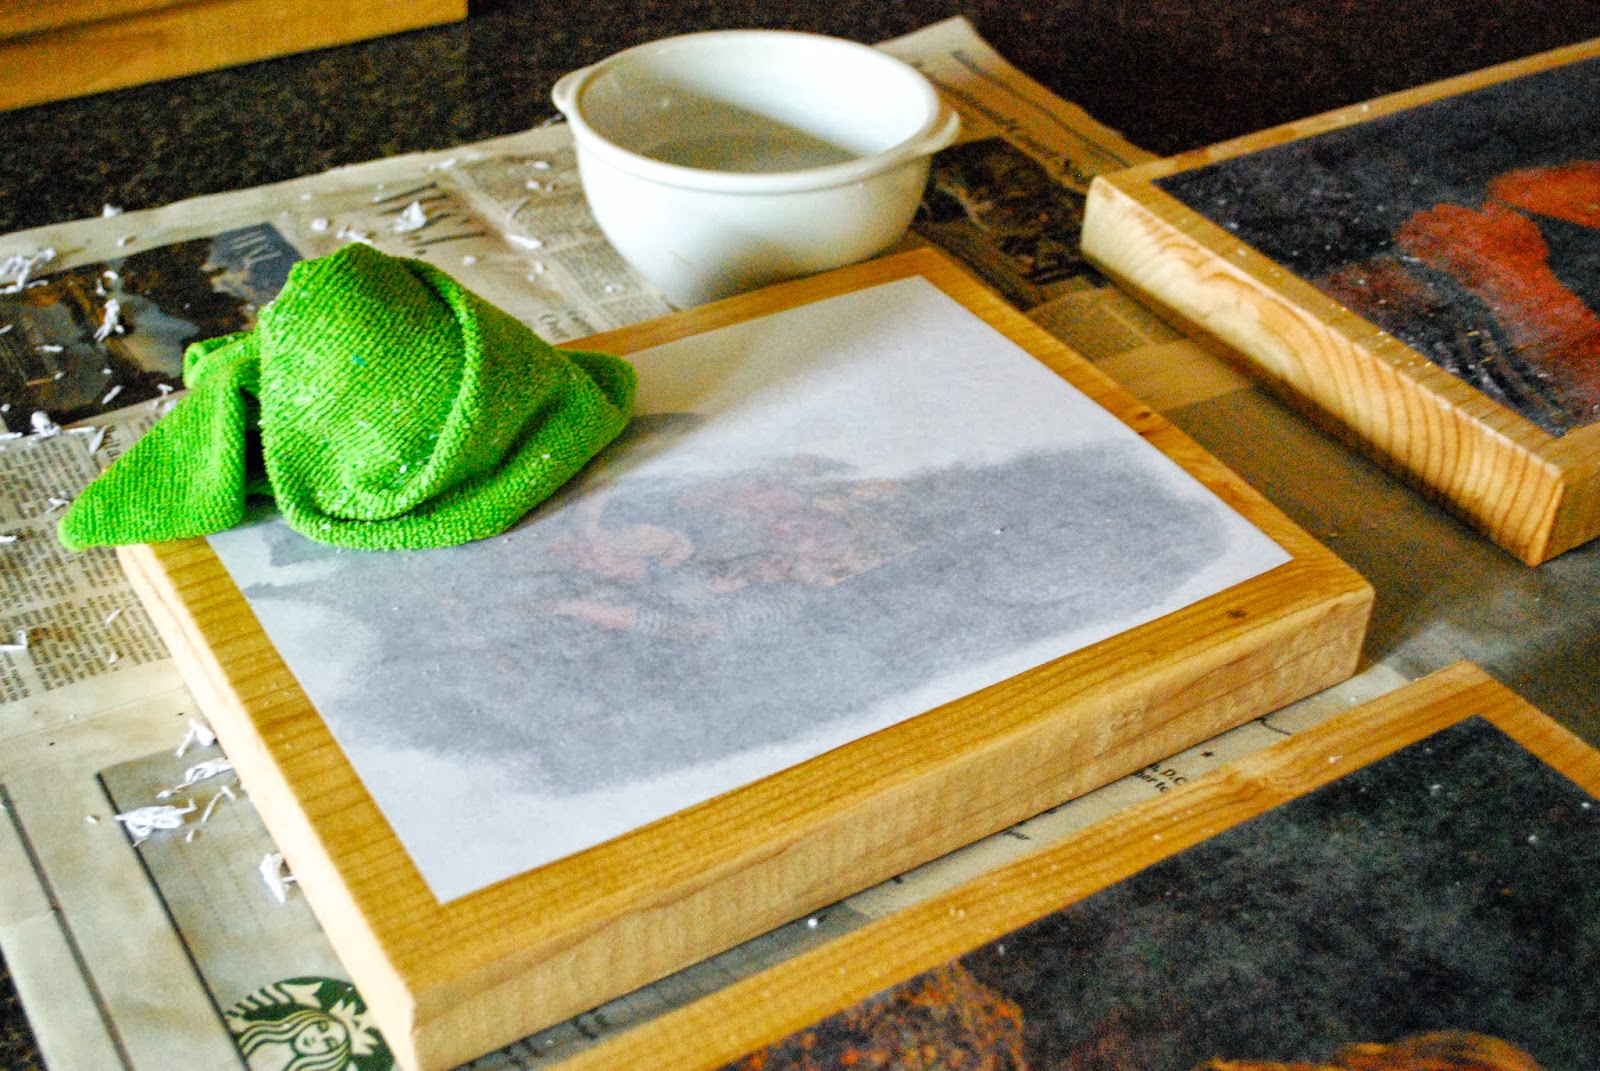
Step Five – Remove the Paper
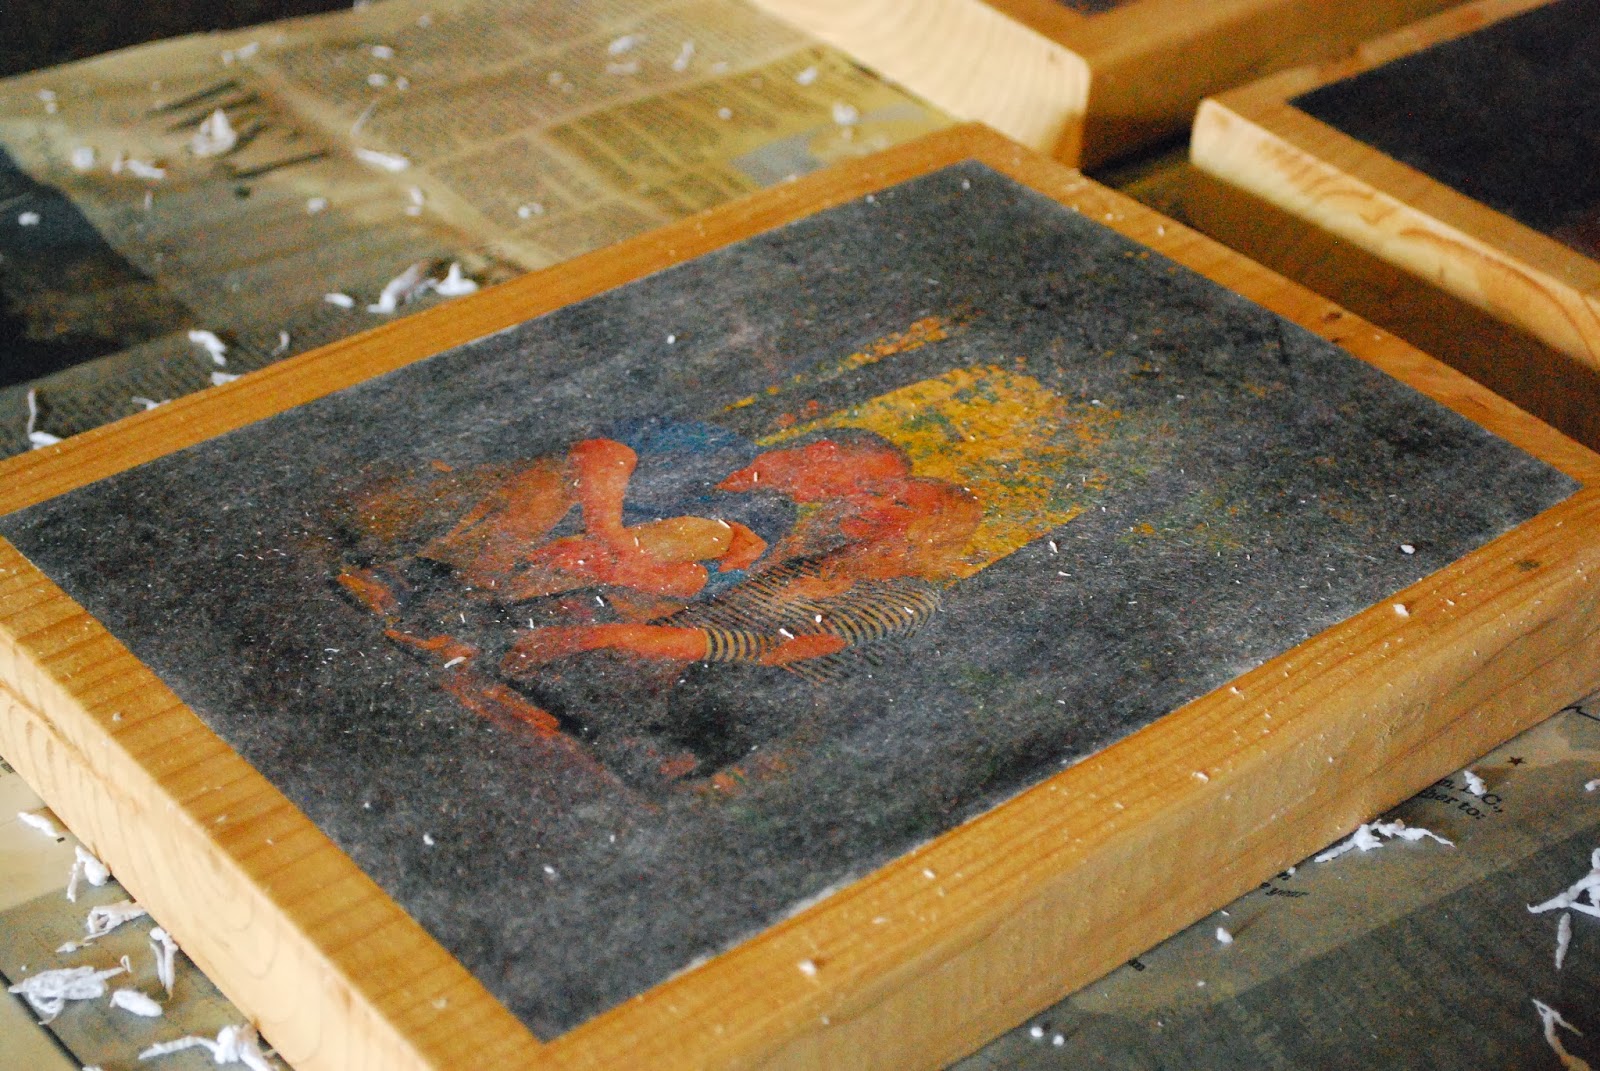
After drying for at least 12 hours, wet the surface of the paper very well with water. Allow the water to soak through the paper completely then begin to rub off the paper with your fingers.
As you rub, you will remove the paper and the ink will be left behind on the wood. Continue to add additional water as needed. Be sure to only use the pads of your fingers because the ink can be scratched off if you use something more abrasive.
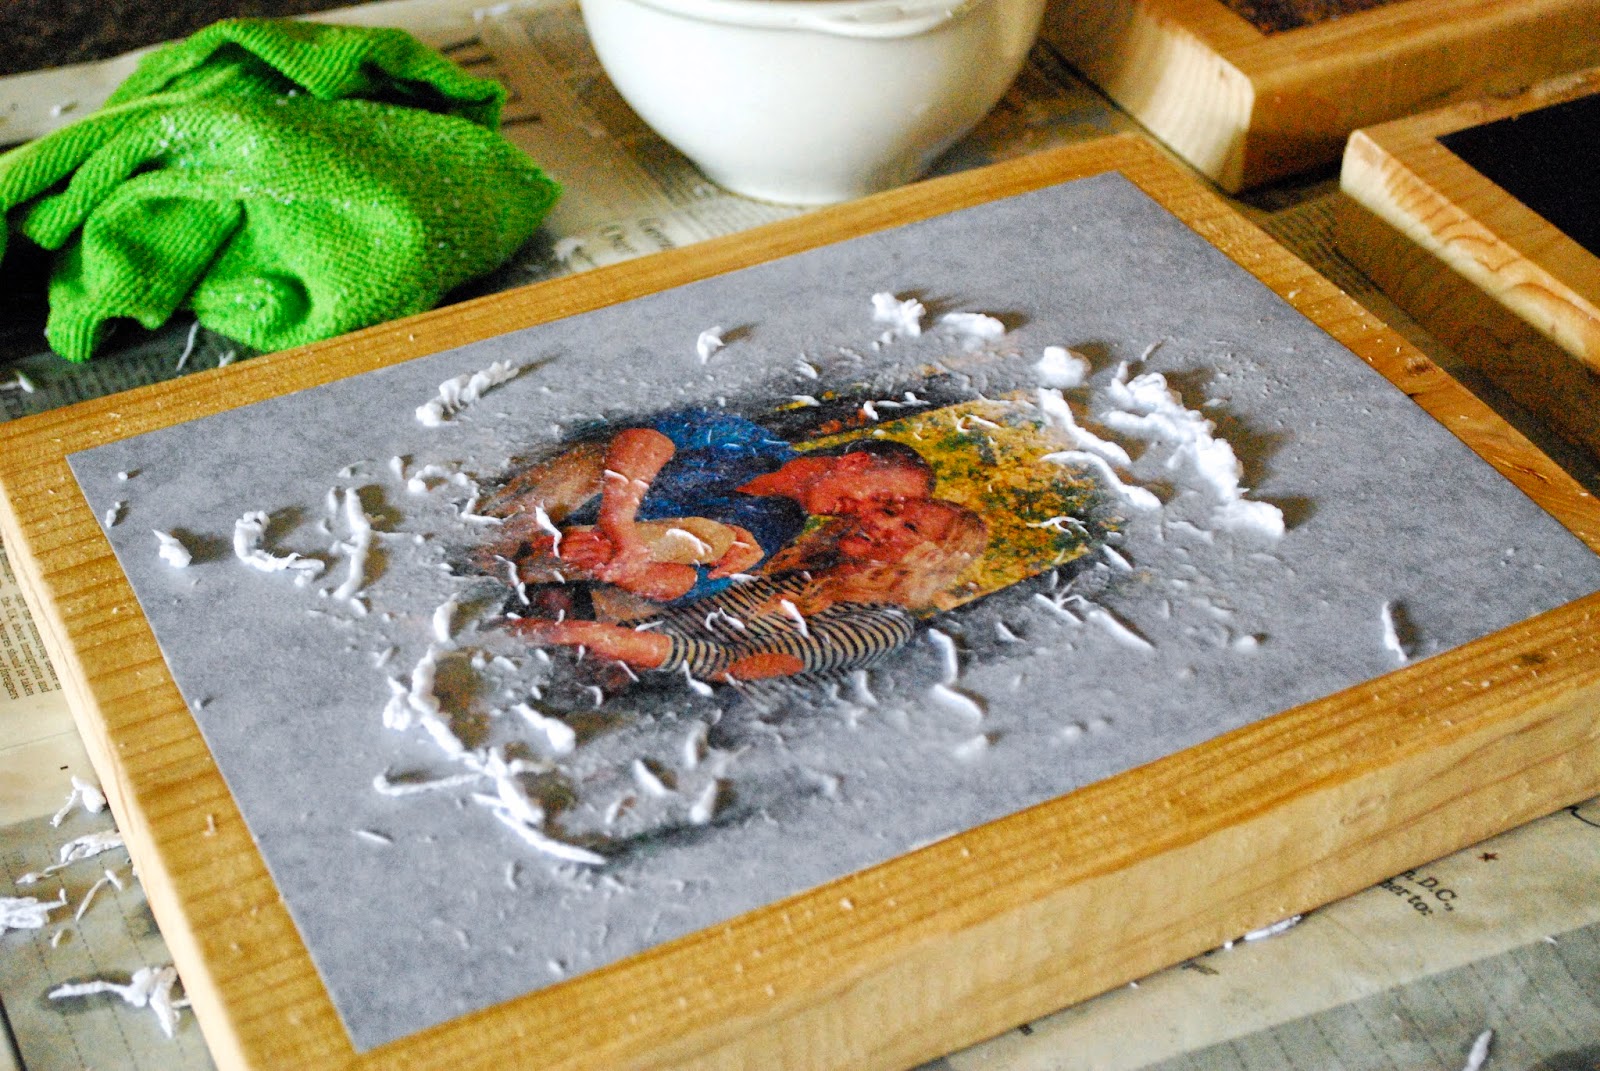
Once you have removed all the visible paper, allow it to dry for about 15 minutes. As it dries, you will see white paper residue appear as a haze over your photo. Keep wetting and rubbing and allowing it to dry. Don’t use more pressure or you will rub away the ink.
This step took me about 8 cycles before I was able to remove all the paper residue so be patient! After I completed the rubbing on all 8 pictures, I saw I rubbed away the surface of my fingertips. They were bleeding!!! So if you are doing more than one photo transfer to wood, grab some friends to help with this step. I wore band-aids around my fingers for days afterward.
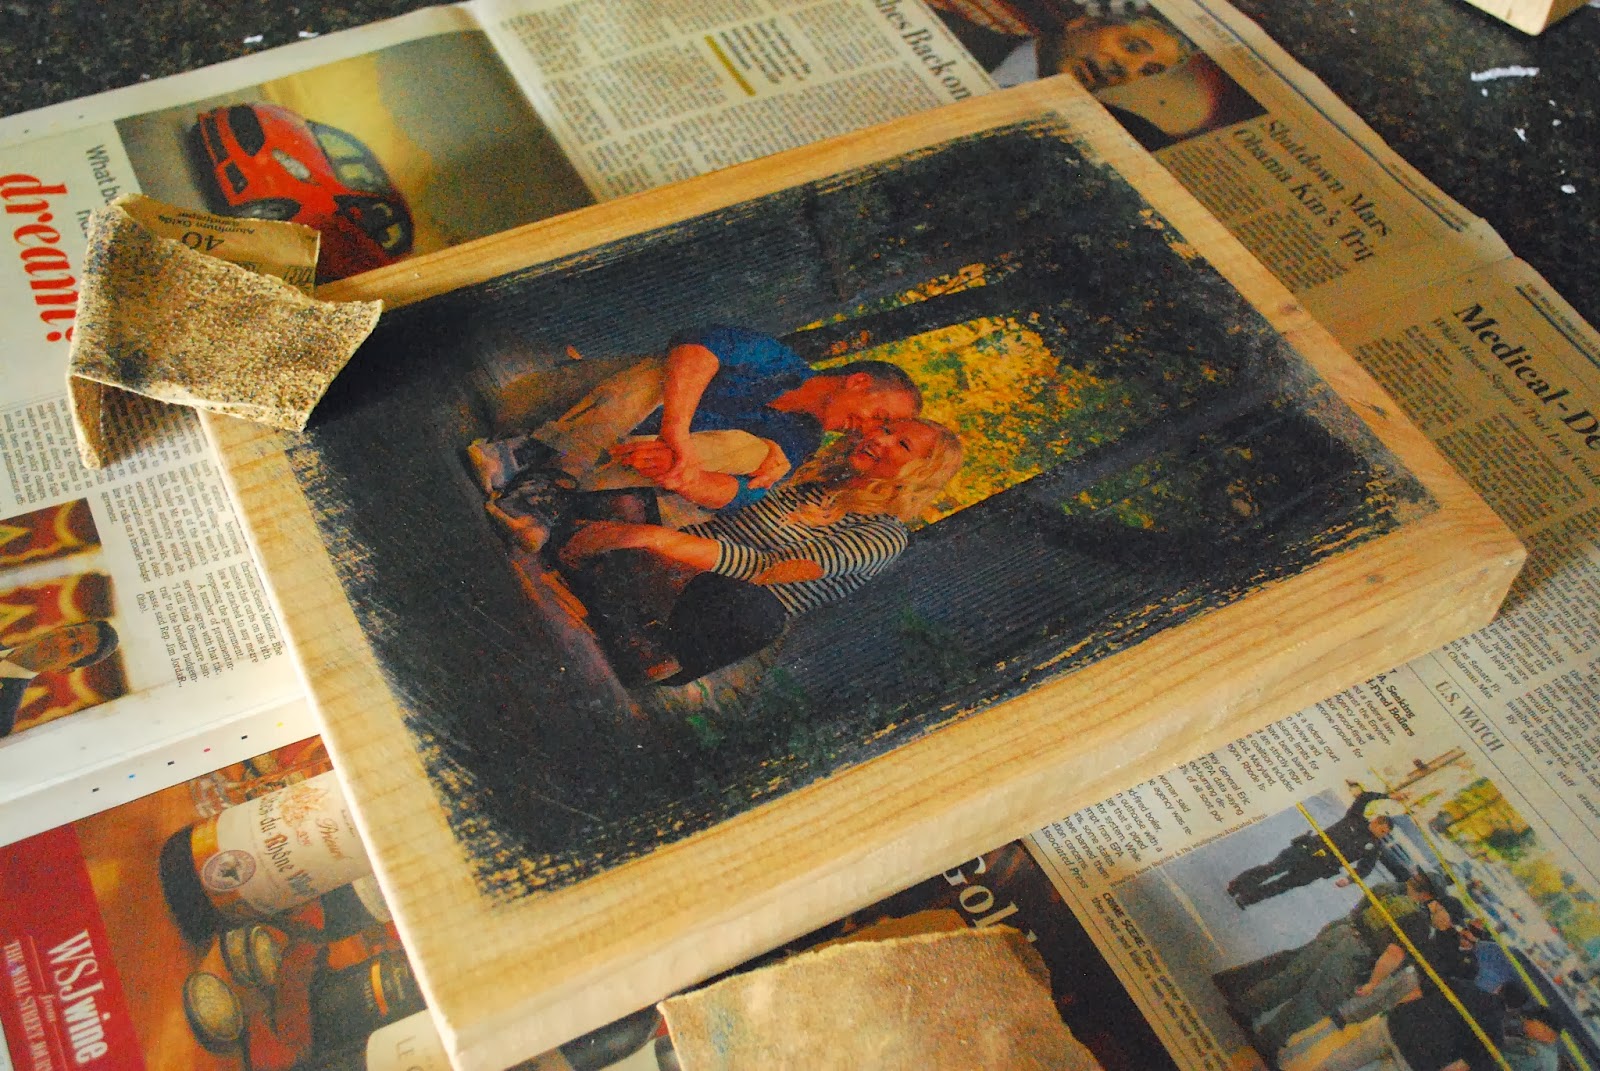
Step Six – Sand the Photo Edges (Optional)
This step is completely optional. I wanted a more rustic look to my finished product so I grabbed some 60-grit sandpaper and sanded the edges of the pictures. I didn’t like the crisp edges and wanted something softer that blended into the wood. Since the transfer isn’t perfect on the wood, I thought the softer edges looked better with the imperfections in the transfer.
If you have any gel medium that didn’t get wiped away in step four, this is the time to remove it with the sand paper. If you don’t remove it, any stain you apply in the next step won’t be able to get to the wood under the gel medium.
Step Seven – Stain the Wood
You can leave your photo transfer to wood completely natural if you would like, but I decided to add a quality wood stain. You could certainly stain over the whole picture if you want. I only wanted the edges stained so it wouldn’t mess with the colors of my photo. I used a clean, dry rag to apply the stain and a different clean, dry rag to remove any excess stain and to blend the stain. Allow the stain to dry for at least 10 hours before moving on to step eight.

Step Eight – Seal the Photo
Once the stain has dried for 10 hours, you need to seal the surface of the photo or design so the ink doesn’t get damaged or scratched. I used the matte finish Mod Podge that I had left over from the glitter vase wedding project. This product also comes in a gloss, semi-gloss, or satin finish. Think about where you will be displaying the project and if there will be glare from light or the sun. If so, go for the matte or satin finish so there won’t be a glare.
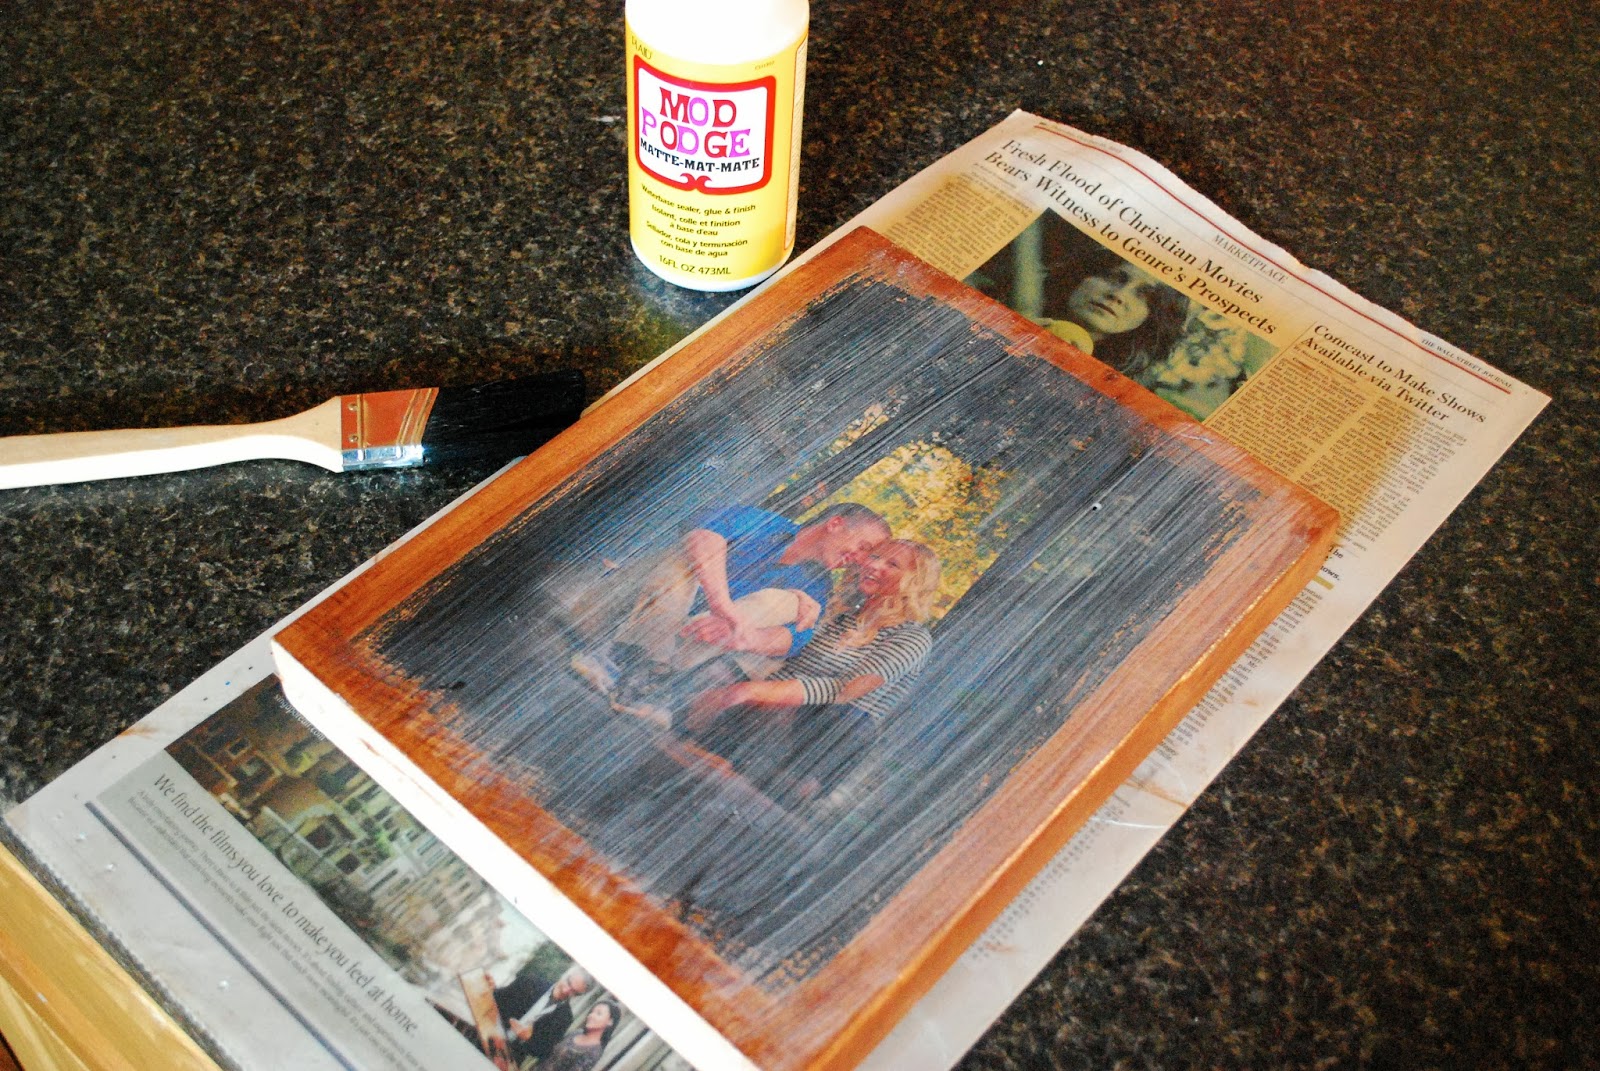
Photo Transfer to Wood FAQs
The best way to transfer the ink of a photo onto wood is by using a gel medium. It provides the cleanest, sharpest transfer of the image without losing the intensity of the color. Other methods transfer some of the ink. A gel medium transfers all of the ink.
Glossy photos that are printed onto photo paper, or printed at a photo shop, will not work to transfer onto wood. It needs to be a photo or design printed onto regular paper with a laser printer. Inkjet printers will not work as well.
What kind of paper is best to use for a photo transfer to wood?
Because you will need to rub away the paper once the ink of the photo transfers, you want to use thin printer paper. Or you will be rubbing away for hours. Nothing more than a 20-pound printer paper.
What kind of wood is best to use?
Any type of wood will work. Generally, a wood that is light in color allows the colors of the photo to come through best. Whatever you choose, be sure it is well-sanded and smooth. You can use wood you already have on hand, a wood plaque made for art projects, or go buy wood from your local home improvement store and cut them to length.
Can I use an inkjet printer instead of a laser printer?
While inkjet ink will transfer, it won’t do a very good job of it. Laser ink will transfer cleaner and more true to your original colors. If you don’t have access to a laser printer, you can always take your file to a local print shop. They will get you set for just a few cents per page.
Can I stain the wood before transferring the photo?
Yes, you can stain the wood before the photo transfer. Be sure it has dried for a few days before you try to use the gel medium. Also, keep in mind that the color of the stain will alter the color of your photo. It’s for this reason that I waited until after I transferred the photo to add the stain to the remaining wood.
Project Variation Suggestions
- Take the same photo transfer to wood concept and try using the same instructions included below to create a text to wood design instead. Just be sure to mirror the image before you print it or it will be backward when you transfer it onto the wood.
- Instead of staining the wood after the photo transfer to wood is complete, you can keep the natural color of the wood and just seal the whole project with Mod Podge. The natural grain and color of the wood will emerge beautifully.
- If you like a monochromatic look in your designs, try a black and white or sepia toned photo to transfer instead. This variation would work very nicely for a more modern decor.
Looking for More Inexpensive DIY?
If this gorgeous and inexpensive photo transfer to wood was just what you were looking for, be sure to check out these other three articles to help save money on your next DIY project!


Looking for more great projects and yummy recipes? Subscribe to My Kitchen Escapades to get them delivered straight to your inbox! You can also stay in touch on TikTok, Instagram, Facebook, Pinterest, and YouTube for all the latest updates!
**My friend, this post contains Amazon affiliate links which means I receive a small compensation, at no additional cost to you, if you make a purchase using my link. If you decide to give this project a try, I will be your bestie if you would use the links from this post. And no worries….I only link to products that I both use and love! ~Carole


236 comments
I love this idea and think they are beautiful.
Can I stain the wood first or do I have to do it after
I haven’t tried that before Caleb but others have done it successfully.
I was wondering the same, i stained my board prior to putting the image on. I did this but instead of using a picture I printed out the words “hey y’all” in white (with a black outline so I could still see where to lay down the paper onto the board) using a laser jet printer at Staples and when I rubbed the paper off only the black outline of the hey y’all was there, all of the white disappeared. Does it not work with colored letters?
Hey Kelsey! The white should work if it is truly printed on the paper. Are you sure white ink was used or was the white just left blank?
I just did a picture that I was wearing a white shirt. It seems the white cane off very easy compared to the other colors in the picture. ( my wife and I in front of a Christmas tree)
what kidn of photos (paper or ink?) should I use to do this?
joriel – if you read the directions, it explains that they are pictures printed on regular copy paper on your printer. Good luck!
Will it work if I print it on a work paper? Or just it need to be a special printer?
Hi Toni! You can use just regular printer paper, but it must be printed using a laser printer or the ink will run away. Good luck!
I just finished a trial version and what’s left of my black and white picture at the end is an image with only a purple-ish tint. It was printed on regular paper on our home printer. Did I rub too much off or do I need to get a printer center to make a copy?
Hi Katie! What type of printer and paper did you use? Do not use photo paper. Just standard white paper. Also, only a laser printer image will work. Not ink jet.
Ink jet wont work…. laser copy!
Beautiful! I do this all the time with mod podge matte to both transfer and seal the photo. I also use an ink jet printer and it works just fine. You just have to let the picture dry fully after printing before transferring.
Thanks so much Natasha for your great input and experience!
I love this! I want to make an oversized ruler for my toddler as a height chart. I can use this idea to add pictures of him at different ages. Thank you for sharing this xx
I really love that idea Annabel! Thanks so much for sharing.
Tried this does not work
I’ve done this alot. It works really good. You should find out what happened n where you went wrong, and try it again.
Celeste- I’m sorry you didn’t have success. Can you be specific as to what went wrong? I had never tried this before either and it went very smoothly. Maybe I can help you troubleshoot what went wrong.
Can i stain my board 1st then let that dry and then apply the gel and picture?
Hi Wendy! I honestly don’t know the answer because that isn’t the process I used. If you try it, please come back and let me know how it worked out!
The ink is just smearing I’ve tried three times and the same thing happens. I was really excited to do this but I can’t get it to work it all goes well until removing the paper
Hey Celeste,
I had the same thing happen to me. A couple things I learned made a huge difference. First, make sure your gel medium is a gloss. The higher the better. Also, use thin paper. I recommend having your imaged printed at Kinkos or such. It’s about $0.50 and well worth it. The colors come out way better and they have a really light paper. Hope this helps.
In the instructions you say use gel matte? Now high gloss?
Hi Amanda! You can use either a matte finish or the high glass option, it is up to you
Wow Celeste! The main thing that comes to mind is to be sure that the picture has set for at least 8 hours to dry before trying to remove the paper with the water. Also, just to be sure that you are using a picture printed on regular office paper, right?
Yes I’m using office paper. I also let them sit for twelve plus hours. Once I get them wet the ink smears or rubs off completely