• Skip to primary navigation
  • Skip to main content
  • Skip to primary sidebar
  • Recipe Index
    • Breakfasts
    • Appetizers
    • Soups
    • Main Dishes
    • Side Dishes
    • Lunches
    • Salads
    • Sandwiches
    • Breads
    • Cookies-Bars
    • Desserts
    • Holidays
  • Top 10 Recipes
  • Kid’s Recipes
  • Freebies
  • FDA
  • Meet Carole

Food Recipes Easy to Make, Tasty and Aromatic

menu icon
go to homepage
  • Recipe Index
    • Breakfasts
    • Appetizers
    • Soups
    • Main Dishes
    • Side Dishes
    • Lunches
    • Salads
    • Sandwiches
    • Breads
    • Cookies-Bars
    • Desserts
    • Holidays
  • Top 10 Recipes
  • Kid’s Recipes
  • Freebies
  • FDA
  • Meet Carole
search icon
Homepage link
  • Recipe Index
    • Breakfasts
    • Appetizers
    • Soups
    • Main Dishes
    • Side Dishes
    • Lunches
    • Salads
    • Sandwiches
    • Breads
    • Cookies-Bars
    • Desserts
    • Holidays
  • Top 10 Recipes
  • Kid’s Recipes
  • Freebies
  • FDA
  • Meet Carole
×

Home » Desserts

Published: Mar 17, 2014 · Updated: Sep 23, 2020 by Carole Jones · 2 Comments

How to Make Flowers from Fondant

Fondant flower tutorial
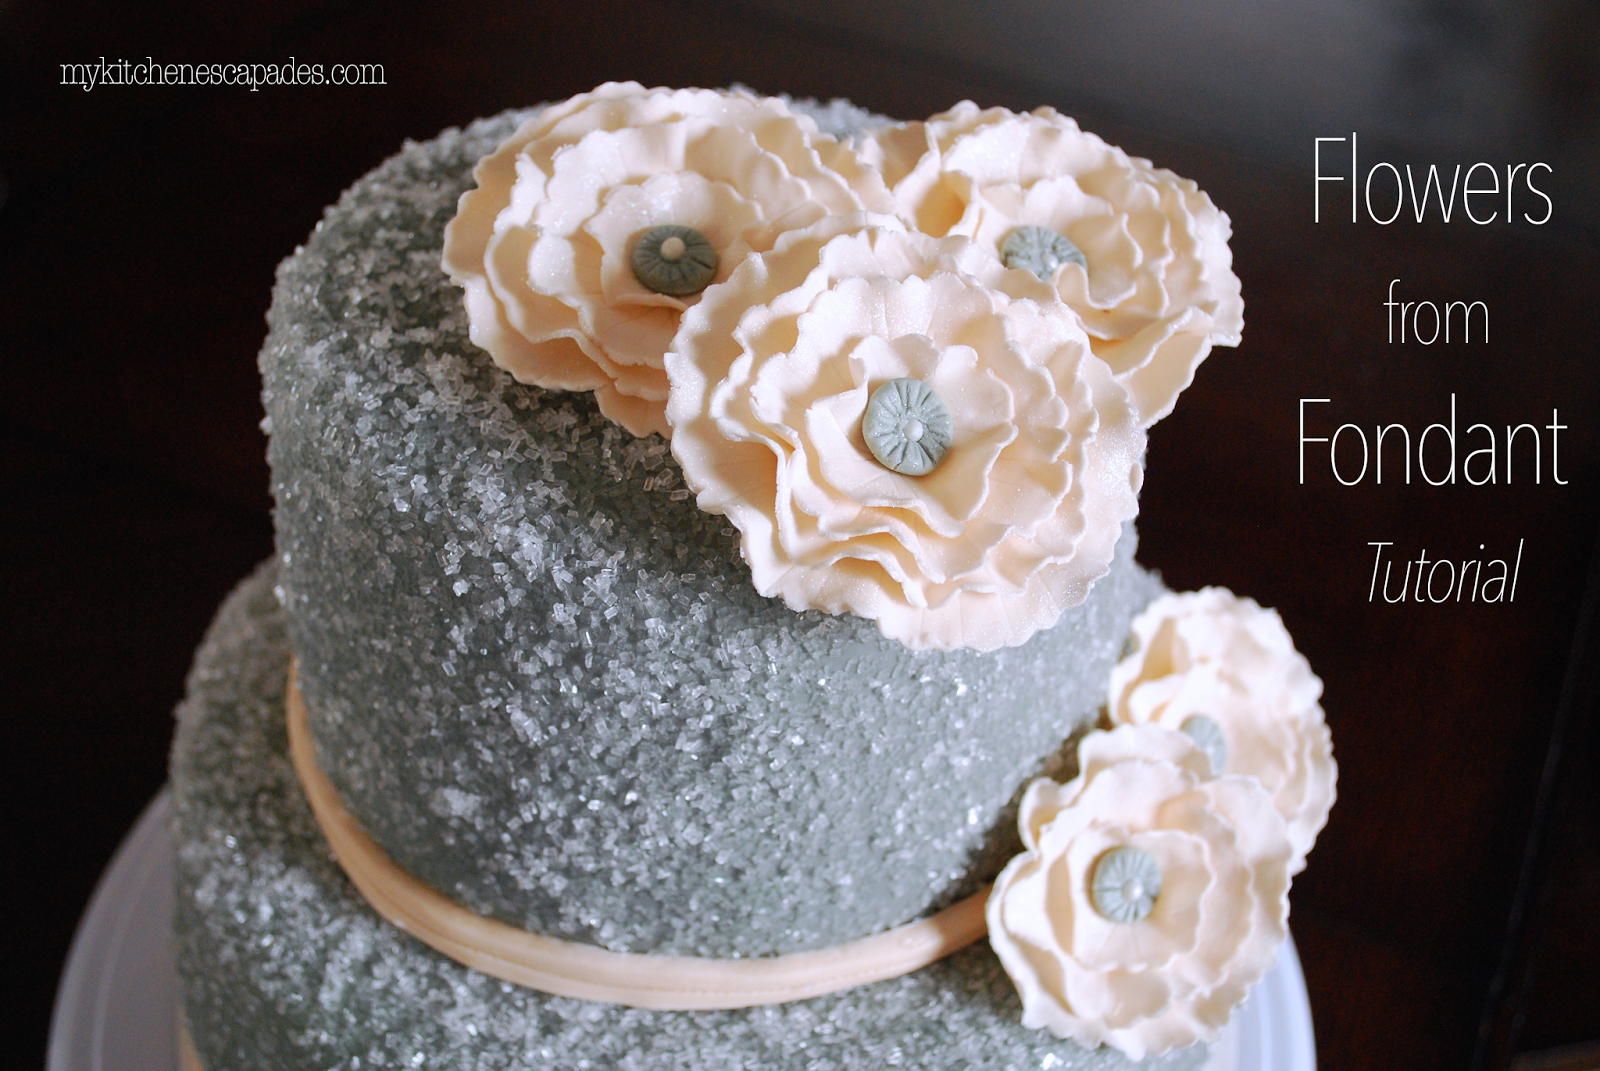
I had the privilege of making a gender-reveal cake last weekend and thought it was so fun that only the doctor and myself knew the sex of that little baby.  Blue or pink cake on the inside is how everyone else found out once they cut into it!
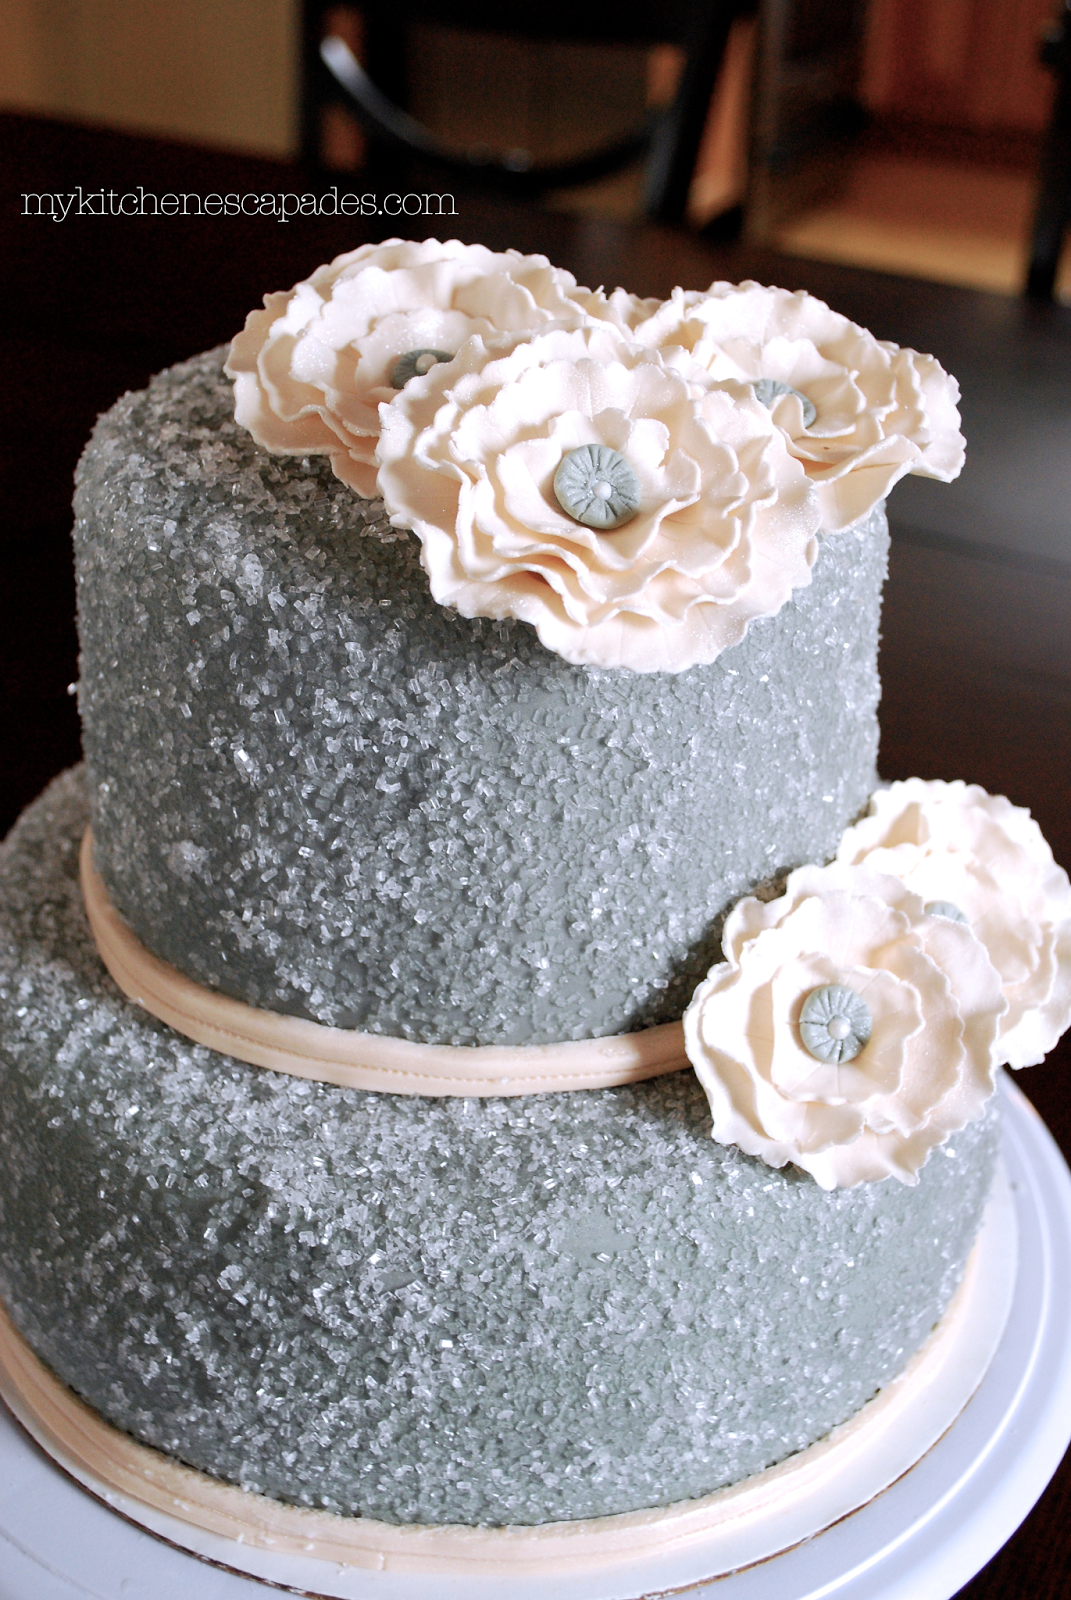
This gorgeous grey and ivory cake was a lot of fun to make, including the fondant flowers.  To recreate them for your next cake, you will need the following items:
  • Fondant
  • fluted round cutters of different widths
  • foam pad of some type (mouse pad, piece of yoga mat, or you can buy a forming mat)
  • forming tools or at a minimum a ball tool
  • luster dust
  • dry paint brush
  • sugar pearls
Begin by rolling your fondant on a surface dusted with corn starch.  You want your fondant very thin.  The thinner your fondant, the more delicate your flowers.  Cut out your fluted round and place on the foam pad dusted with corn starch.  Keep leftover fondant covered because it will dry out.
Use a ball tool and gently begin to rub the edges in small, circular patterns until it flattens and flutes out.  Go all the way around the edge and then work on the center section.

Use a veining tool to add some lines from the center of your petal.  No perfect lines required here so don’t worry!

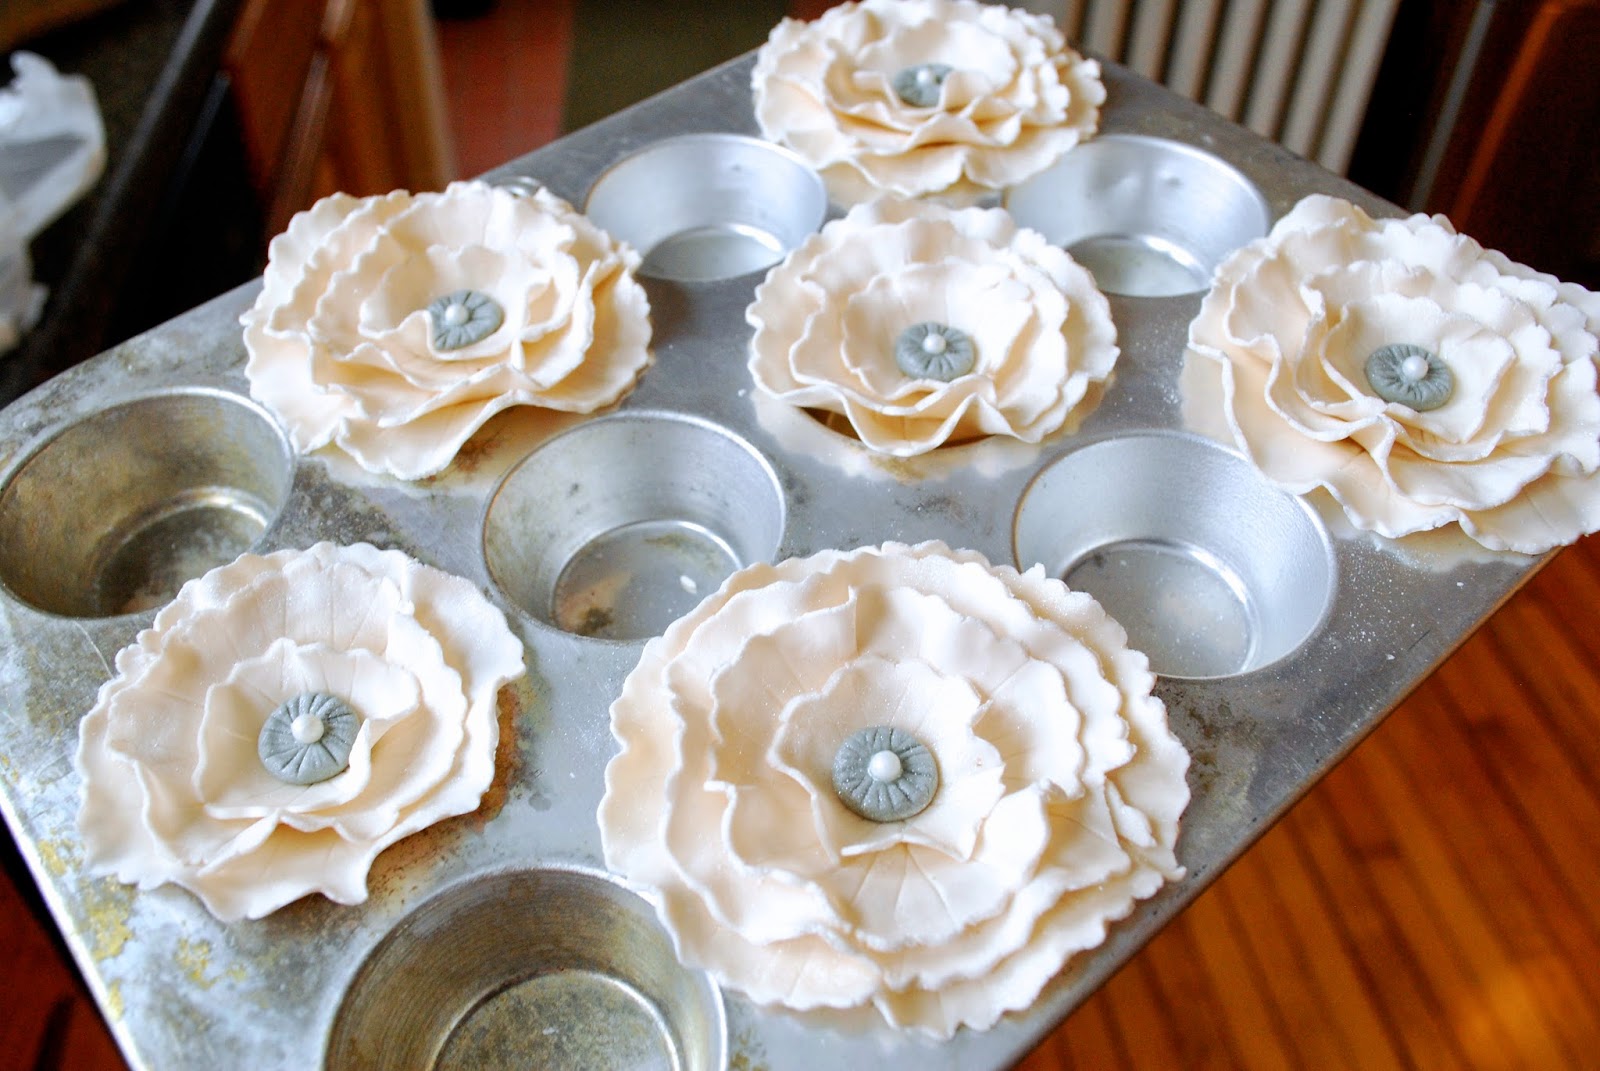
Place your petal into something that will allow it to be shaped into a more cupped shape.  They sell cups for this purpose, but I use mini muffin tins and other objects from my kitchen instead.  Shape the petal to the desired shape, adding some ruffling to the edges, and allow it to dry for about an hour.  Repeat with the other sizes.  I used four different, graduated sizes of circles for my flowers.

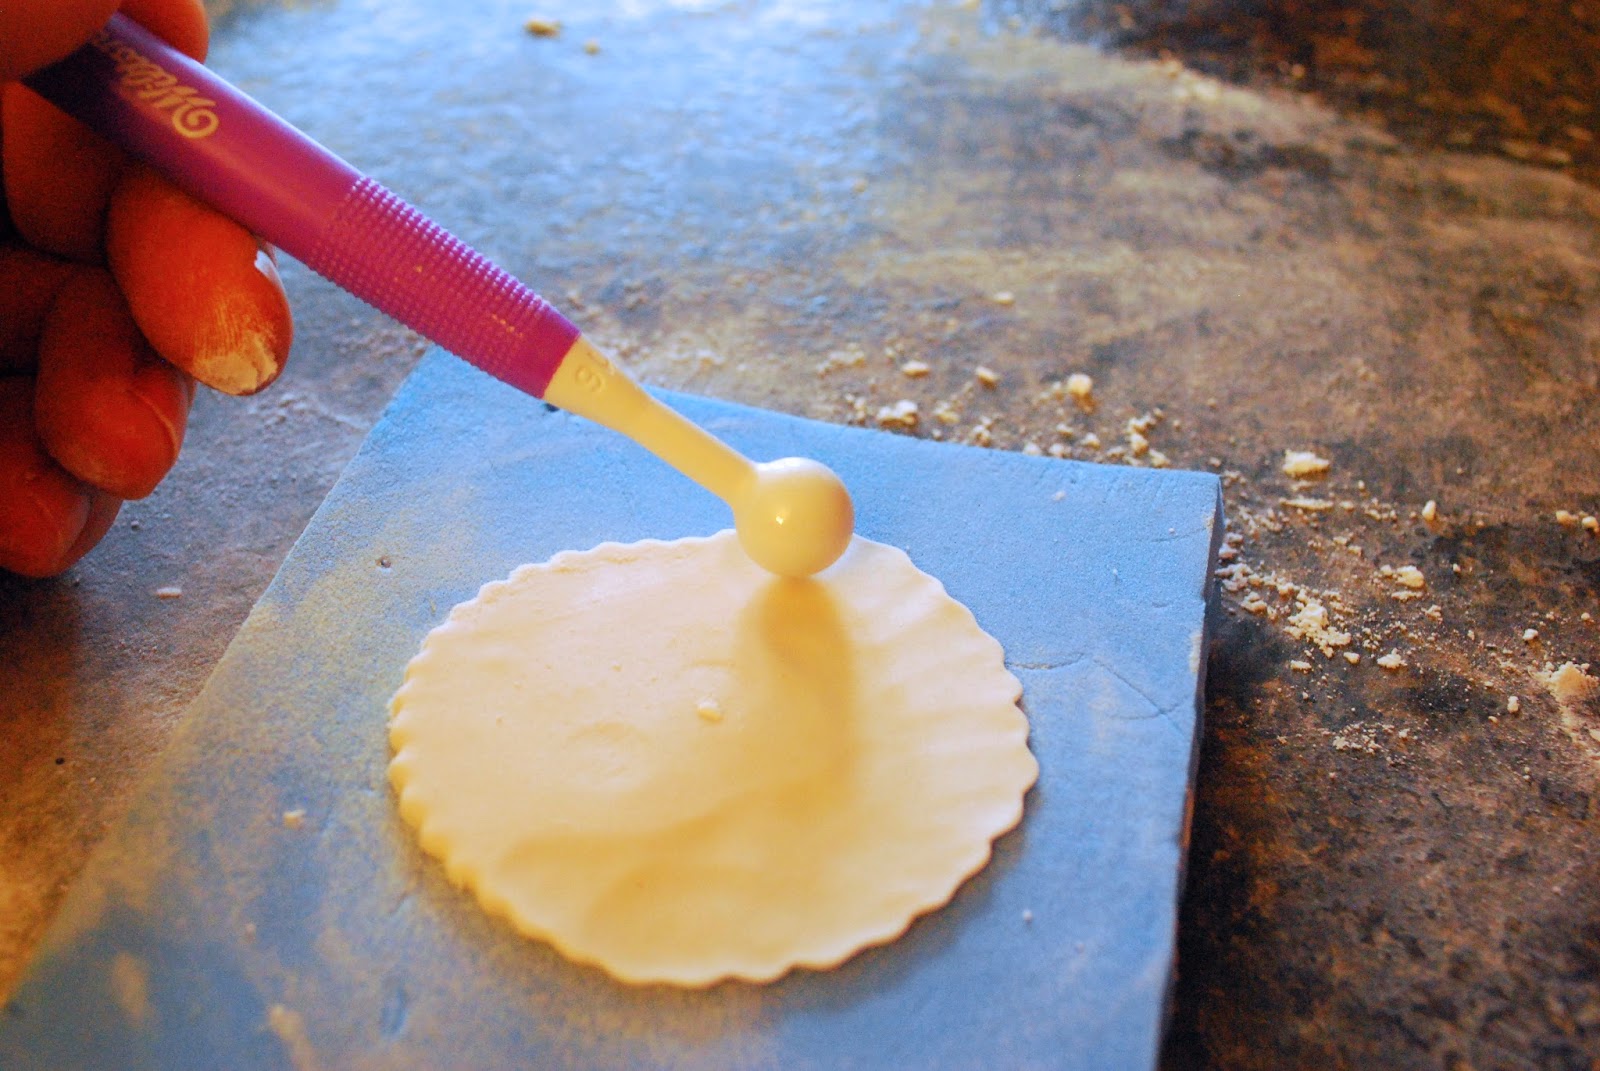
While your petals are drying, work on your centers.  Roll out a pea sized piece of fondant into a smooth ball and flatten it with your finger.  Use a tool to add the pattern around the edges and then add an indentation in the center.  Add a small drop of water to the indentation, then top it with a sugar pearl.

fondant flowers drying on muffin tin

Once the petals have dried for about an hour (you want the edges firm, but the center still a bit pliable), it is time to assemble.  Add a dab of water to the center of your biggest petal, then top it with the next smallest sized petal.  Repeat again with the third and fourth petals.  Since the centers are still a bit pliable, you will be able to tweak the way each layer sits to make them just like you want them.  Add a bit more water to the center and then add the prepared centers with the sugar pearls on them.  Move them back to the muffin tins to allow to dry completely overnight.

fondant flowers
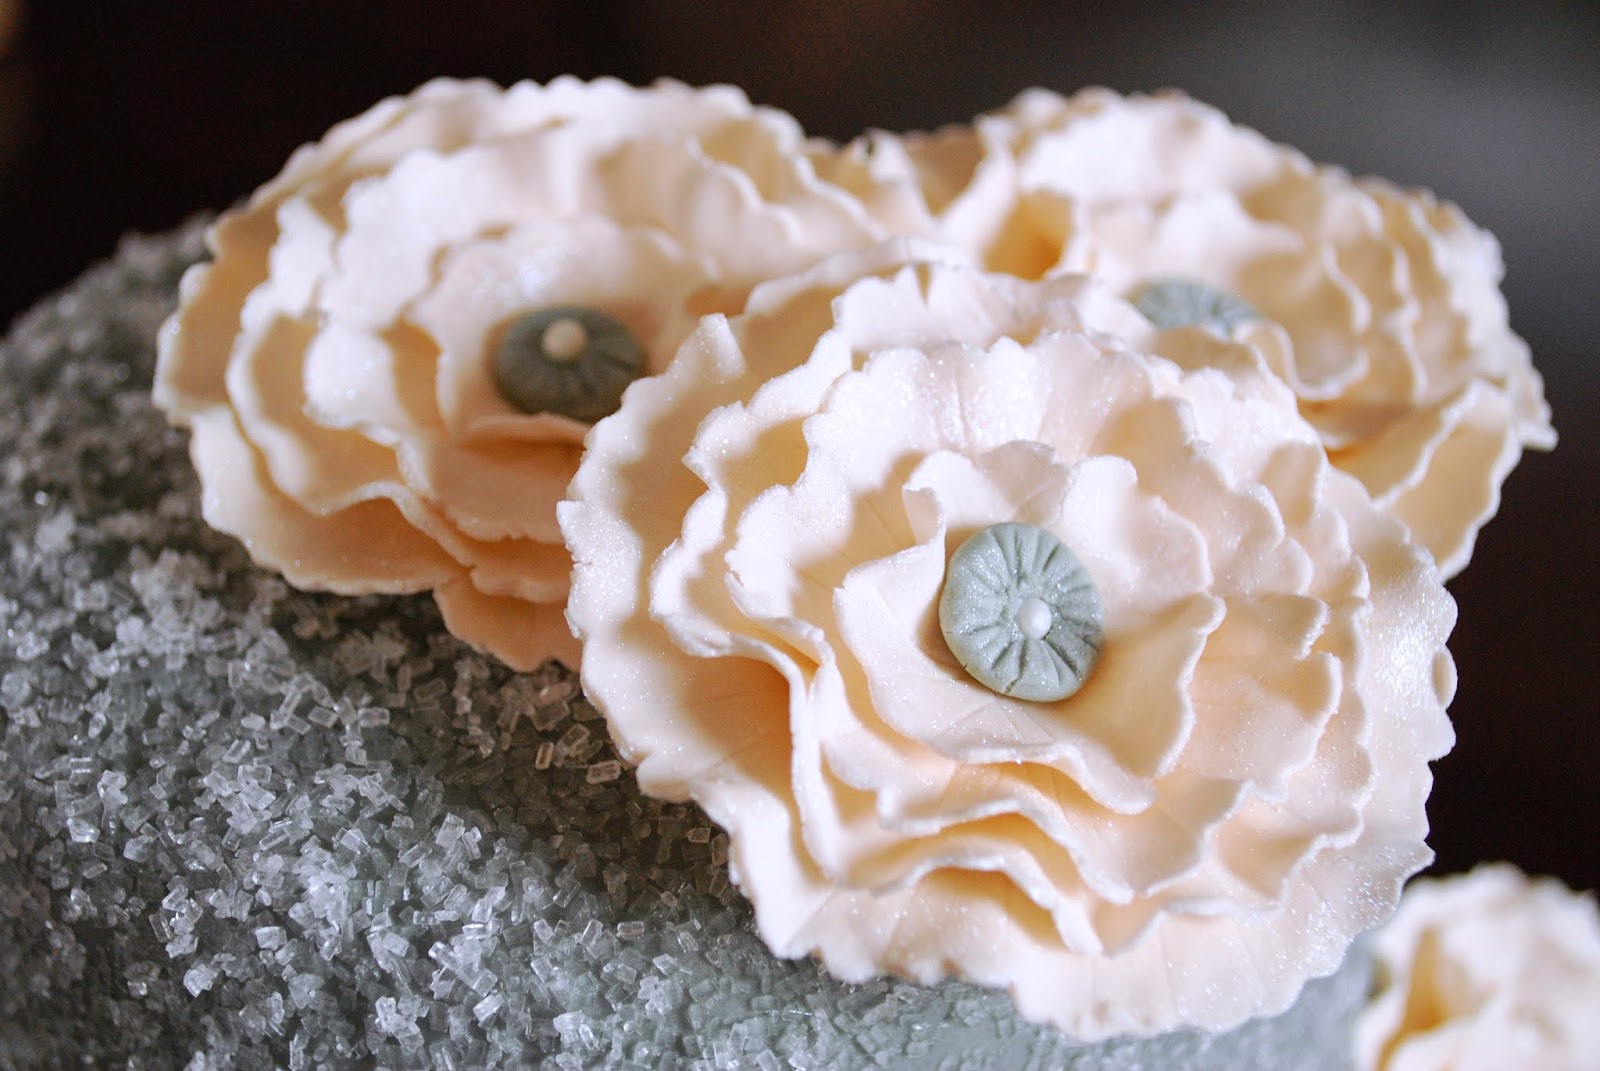
Once they are dry, brush on some luster dust over your finished flower for the perfect shimmer.  This last step really adds some needed dimension and finishing to your flowers so please give it a try!
Layer cake grey and pink with fondant flowers

Categories: Desserts Tags: Cake

Filed Under: Desserts
2 Comments
  • Facebook
  • Instagram
  • Pinterest
  • Twitter
  • YouTube

Reader Interactions

Comments

  1. Dips says

    March 15, 2014 at 10:14 am

    Very pretty flowers, just hopped over from the Super Saturday Link Party (my first!). I love working with sugarpaste too, so would love for you to pop over to my blog DipsDesigns.com and take a look at my projects too

    Reply
  2. Susan Lindquist says

    March 15, 2014 at 1:11 pm

    So pretty! You make it look so easy!

    Reply

Leave a Reply Cancel reply

Your email address will not be published. Required fields are marked *

Primary Sidebar

Hey there my friend! I’m Carole Jones, a momma to 6 crazy kiddos and honestly, I’m just trying to get my kids to eat something that isn’t chicken nuggets and french fries.

More about me →

FOLLOW CAROLE ON YOUR FAVORITE SOCIAL MEDIA

  • Facebook
  • Twitter
  • Pinterest
  • YouTube
  • Instagram
  • TikTok

Recent recipes

  • Air Fryer Tater Tots
  • Shrimp Salad Recipe
  • Air Fryer Hot Dogs
  • Hunan Beef

Popular recipes

  • Roasted Baby Potatoes
  • Chopped Thai Chicken Salad with Peanut Dressing
  • Cheesy Vegetable Pasta Bake
  • Parmesan Chicken Bake

Footer

FREE MEMBERSHIP for you weekly recipe fix


Top 5 Most Read Recipes

Pork Carnitas

Old Fashioned Donut Muffins

parmesan chicken bake

Parmesan Chicken Bake

Chicken Cordon Bleu Casserole

Sushi Rice Recipe


Follow Carole on Your Favorite Social Media

  • Facebook
  • Twitter
  • Pinterest
  • YouTube
  • Instagram
  • TikTok

Recipes

Breakfast

Appetizer

Soup

Main Dish

Side Dish

Lunch

Air Fryer

Salad

Sandwich

Bread

Dessert

Grab my newest cookbook here!

30 Minute Cooking from Frozen Cookbook

My blog contains affiliate links, which means I receive a small compensation if you make a purchase using my link, at no additional cost to you. And no worries, I only link to products that I both use and love! ~ Carole


Top 10 Recipes | Privacy Policy | About

Copyright © 2023 My Kitchen Escapades