

My plan is to publish the basic instructions that I used, but please know that I know how to write food recipes, not really sewing instructions. To make it super easy, I used either the full 45″ width of fabric or exactly half of that width in all my measurements. Please don’t hesitate to drop me questions you have but again….I am definitely not any type of sewing expert.

Designed and created by Carole Jones
* All seams are 1/4 inch sewn. If you like a wider seam, then adjust your measurements accordingly.
* To cut out the curve for the arms down to the waistband, fold the 22.5″ side in half to find the center of that piece and measure out 5″ from the center point. Mark. Measure up 3″ from the bottom along the 14″ side and mark. Draw a curved line from the top mark down to the side mark, then cut along the curve. When opened, you have the top piece.Waistband:
1 piece cut 2″ by 22.5″
* With wrong sides together, sew the waistband to the bottom of the front top piece. Open and press flat.Top Lining Piece:
*Trace the outline of the front piece with the waistband sewn onto the fabric of your lining. Cut out.
2 Waist ties:
4 pieces cut 2″ by 45 ”
* Place two pieces right side together and sew along three sides, leaving open one of the short sides. Trim the sewn corners and turn right side and press flat. Repeat for the other waist tie.
2 Neck ties:
4 pieces cut 2″ by 22.5
* Place two pieces right side together and sew along three sides, leaving open one of the short sides. Trim the sewn corners and turn right side and press flat. Repeat for the other neck tie.
Bottom Pieces:
2 pieces cut 22.5″ x 15″ (one is from the front material, one is from the lining material)
* With right sides together, sew the 22.5″ side of the bottom front piece to the waistband of the front top. Press seams open.
* With right sides together, sew the 22.5″ side of the bottom lining piece to the lining piece of the top. Press seams open.
Ruffles:
3 pieces cut 5 1/2″ x 45″
* Using a double rolled over hem, hem all four sides of each piece of ruffle material, except for whichever ruffle will be the top ruffle. You need to leave one of the 45″ sides raw on the top ruffle.
* Run a basting stitch along the top of each ruffle and gather it so it will fit along the width of the bottom front piece, leaving 1/2 inch of the front piece on each end. You need this 1/2 inch of each side so the ruffle doesn’t get sewn into the seam when you sew the front to the lining!
* Using your top ruffle, pin the raw edge in between the bottom of the top waistband and the bottom piece, being sure right sides are together of your top and bottom pieces. Don’t forget to leave the 1/2″ space on each end! Sew closed. Open and press.
* Pin the next ruffle under the top ruffle, being sure the top ruffle covers the top 1/2 inch of the new ruffle you are pinning on. Again, be sure you leave the 1/2″ space on the ends! Sew into place.
* Pin the next ruffle under the second ruffle, being sure the second ruffle covers the top 1/2 inch of the new ruffle you are pinning on. Again, be sure you leave the 1/2″ space on the ends! Sew into place.
* Pin the waist and neck ties in place on the right side of the front piece. With right sides together, pin the lining piece on top of the front piece. It is helpful to pin the ruffles and ties out of the way of the seams you are about to sew before placing on the lining piece. Sew all the way around the whole apron, leaving the bottom hem open. Turn right side out and press.
* Turn in the bottom hem by 1/2″ to the inside of the apron and press. Top stitch along the bottom of the hem.


13 comments
Cute! How many yards of fabric did you buy to make one apron?
It all depends on if you are going to make it all the same color or not. Measurements for each piece are listed above.
Thanks, I will just take those measurements to Joann’s & have them convert it to how many yards I will need, I am not good at that!
Can I get on your gift list, please! The aprons are ADORABLE!!!!!
Carole, this is one of the cutest ruffled aprons I’ve seen, am so looking forward to making it in very bold colors. Good job…you know your stuff.
Thanks so much! I’ve kicked myself a few times since making them that I didn’t make one for myself!!
I am wondering what size these aprons are. I want to make them in a children’s size. Any help would be appreciated.
Ginny – they are definitely an adult sized apron. I made them for my three nieces who are teenagers.
I made a Christmas version of this apron today so that I could have something fun to wear on baking day. Your measurements and directions were easy to follow and it turned out perfectly! Thank you! I’m off to make one for my little girl now.
Jamie- I’m so glad it worked out for you! Thanks for coming back and letting me know
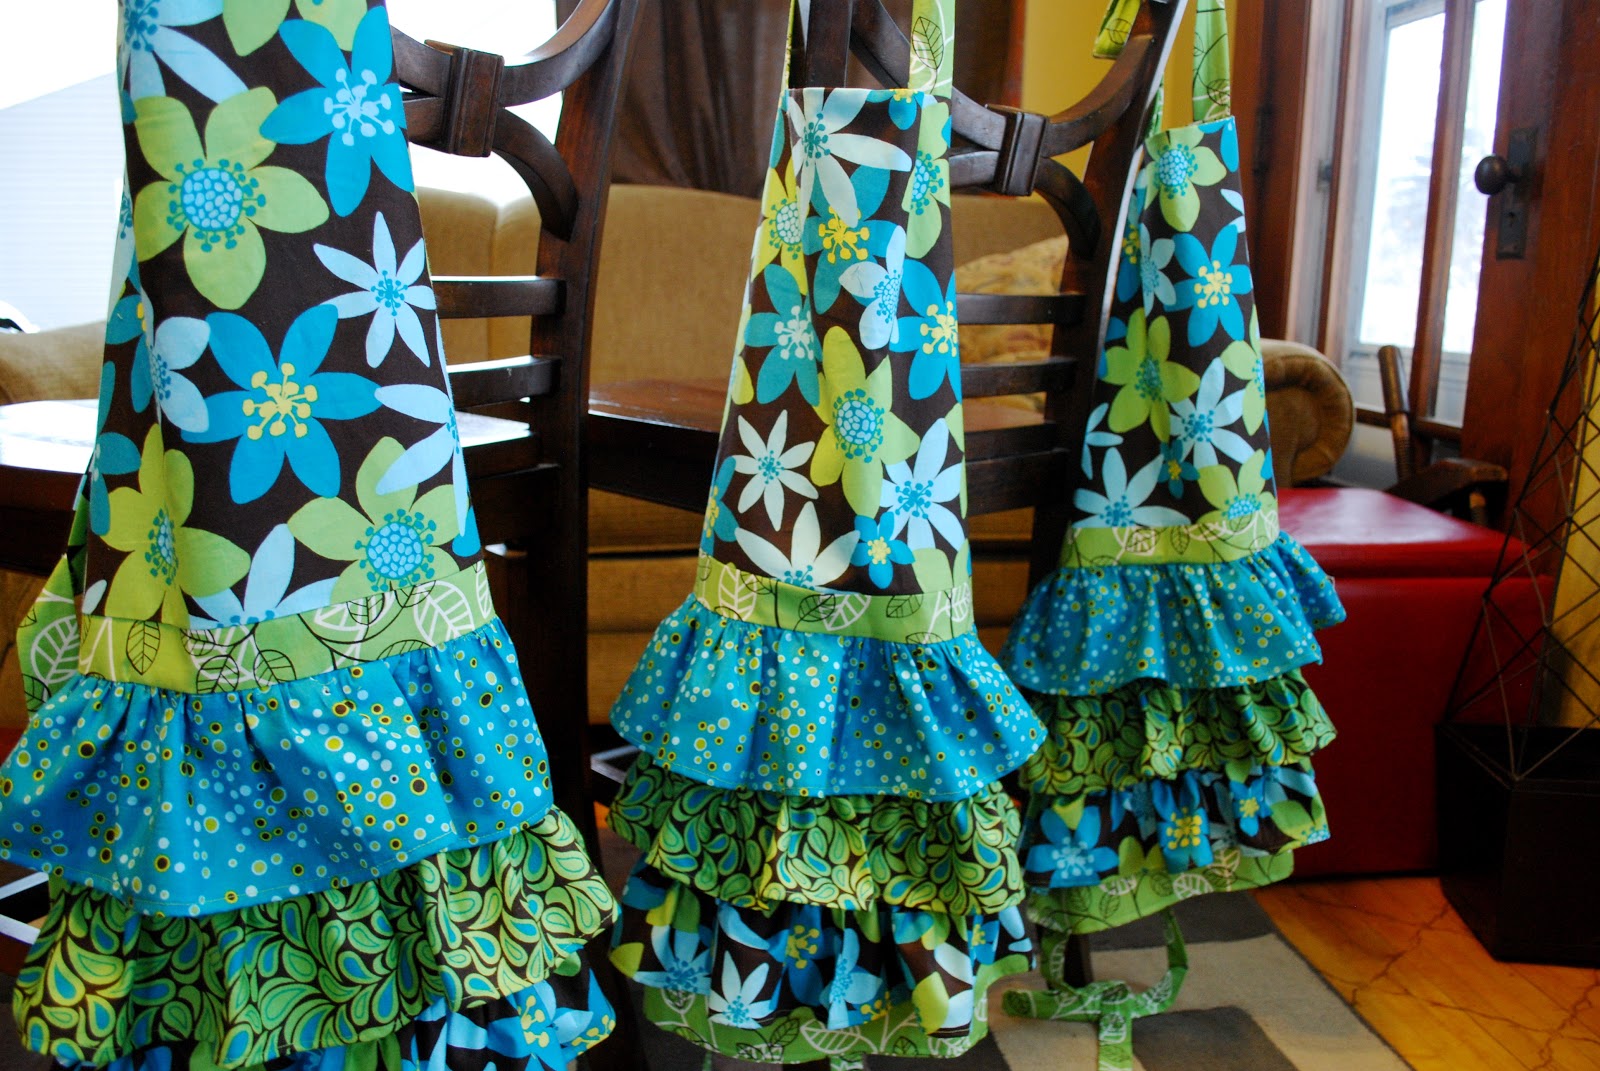
The Ruffled Hem Of Our Ruffle
[…] the right side of the front piece. With right sides together, pin the lining p […]
Hi Carole
Just reading through your instructions, and because I want to make one of these cutest of aprons:
When you come to insert the first ruffle between the bottom of the front waistband and the front lower piece, haven’t you just sewn those two bits together according to the instructions in the paragraph titled ‘Bottom Pieces’?
Hi Kate! I’m hoping I understand your question correctly 🙂 If I could go back 7 years and make this post again, I would have included step by step pictures! In the “Bottom Pieces” part of the instructions, you have only connected them to the waistband for the front piece and for the lining piece, you have connected it to the top lining piece. It will still be open so you can attach the ruffles.